Fault Tree Diagram
This is the workspace where the Fault Trees are developed and the user can interact with them.
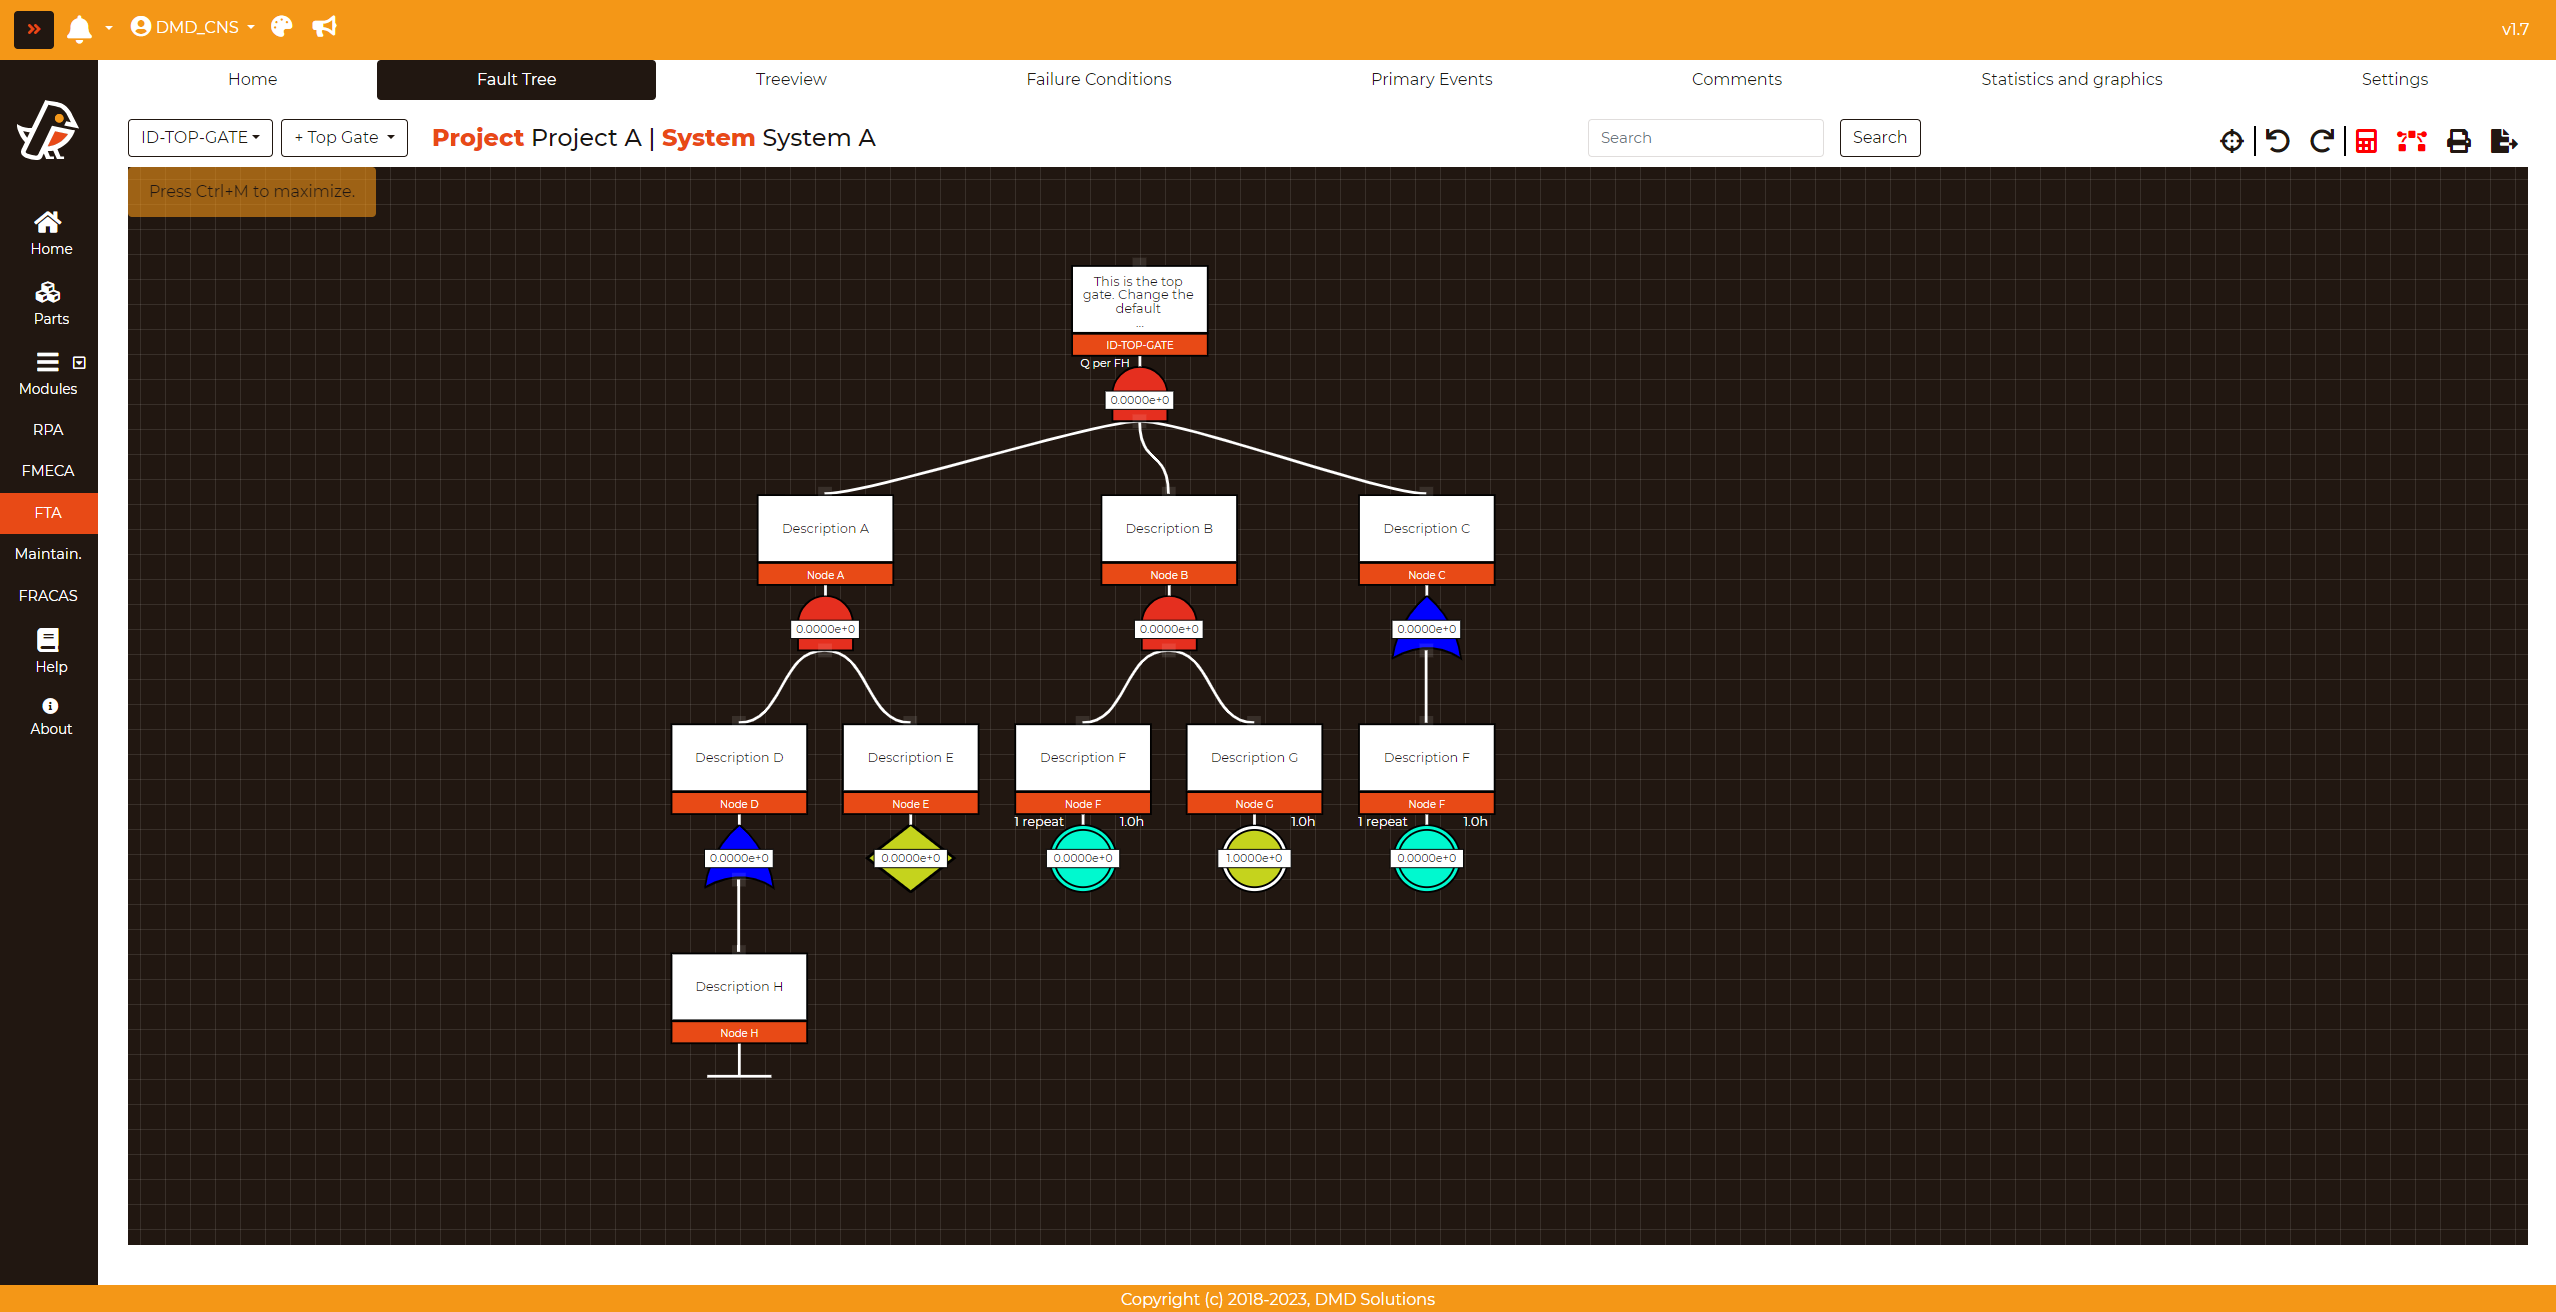
Diagram Actions
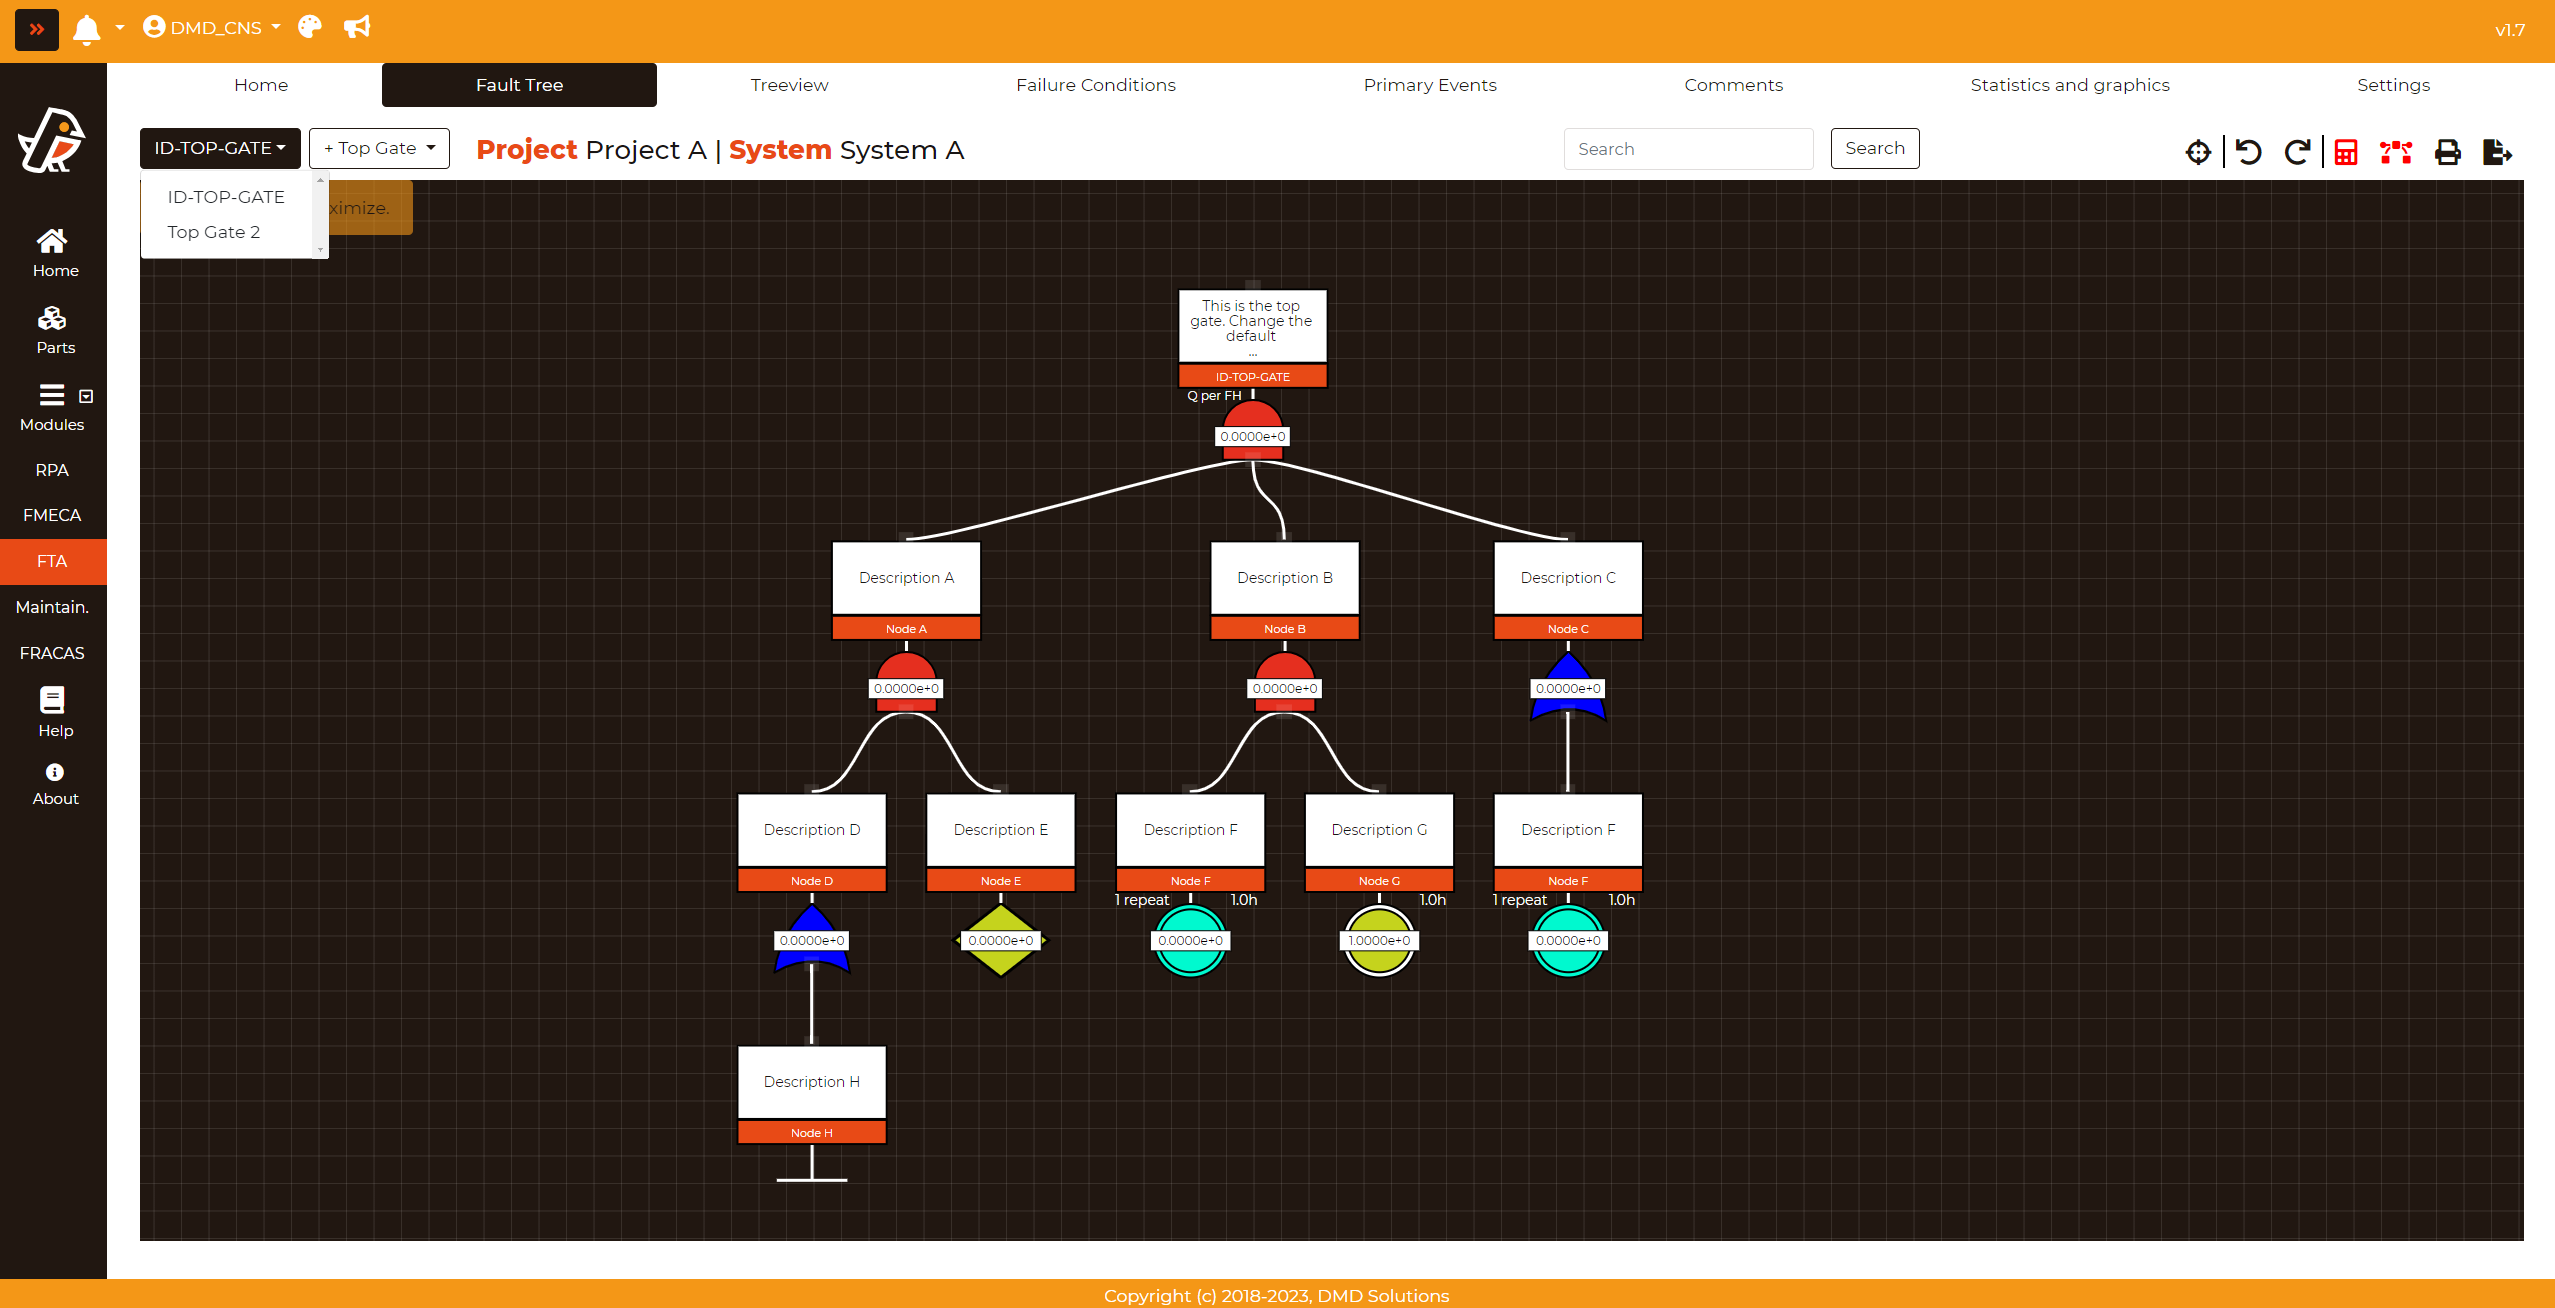
Select a Fault Tree to be displayed in the diagram
In the top-left dropdown, the user can change between the different Fault Trees of the system.
Search a node in the diagram
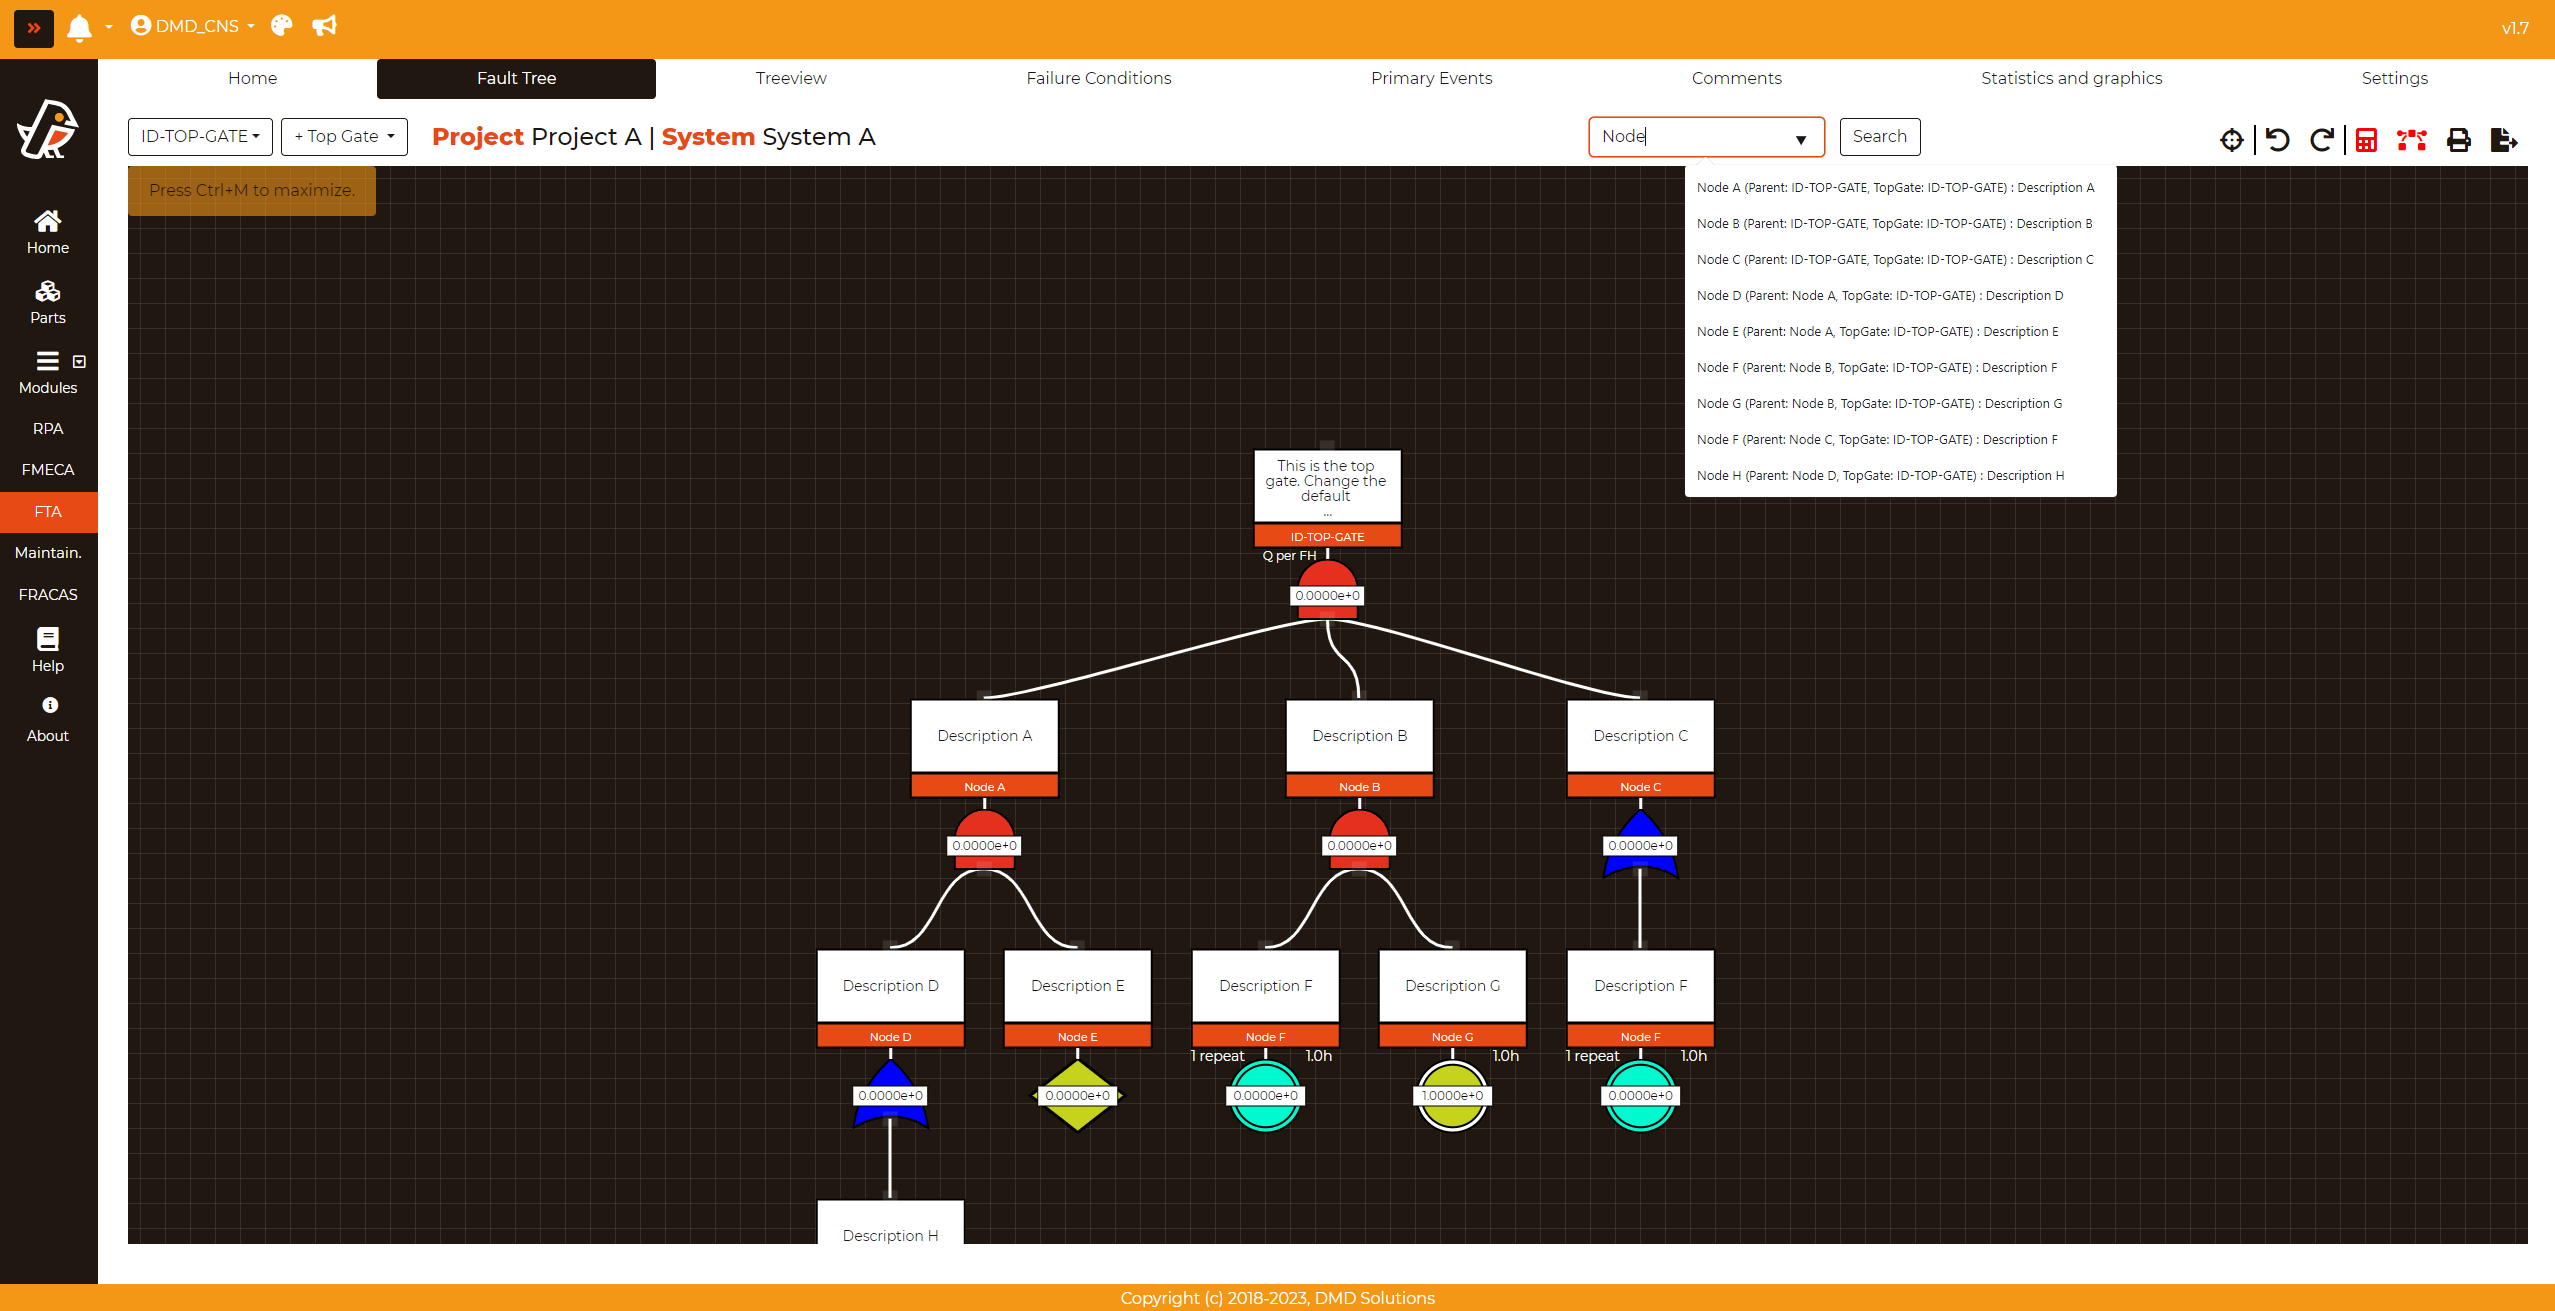
In the top-right text-box the user can search a node in the different Fault Trees of the system. Write the name of the node and click on Search.
Note
While the user writes the name of the node, a list with the nodes which contain the written characters will appear.
Maximize the diagram
To maximize the diagram and make it easier to read, press CTRL+M. To return, press CTRL+M again.
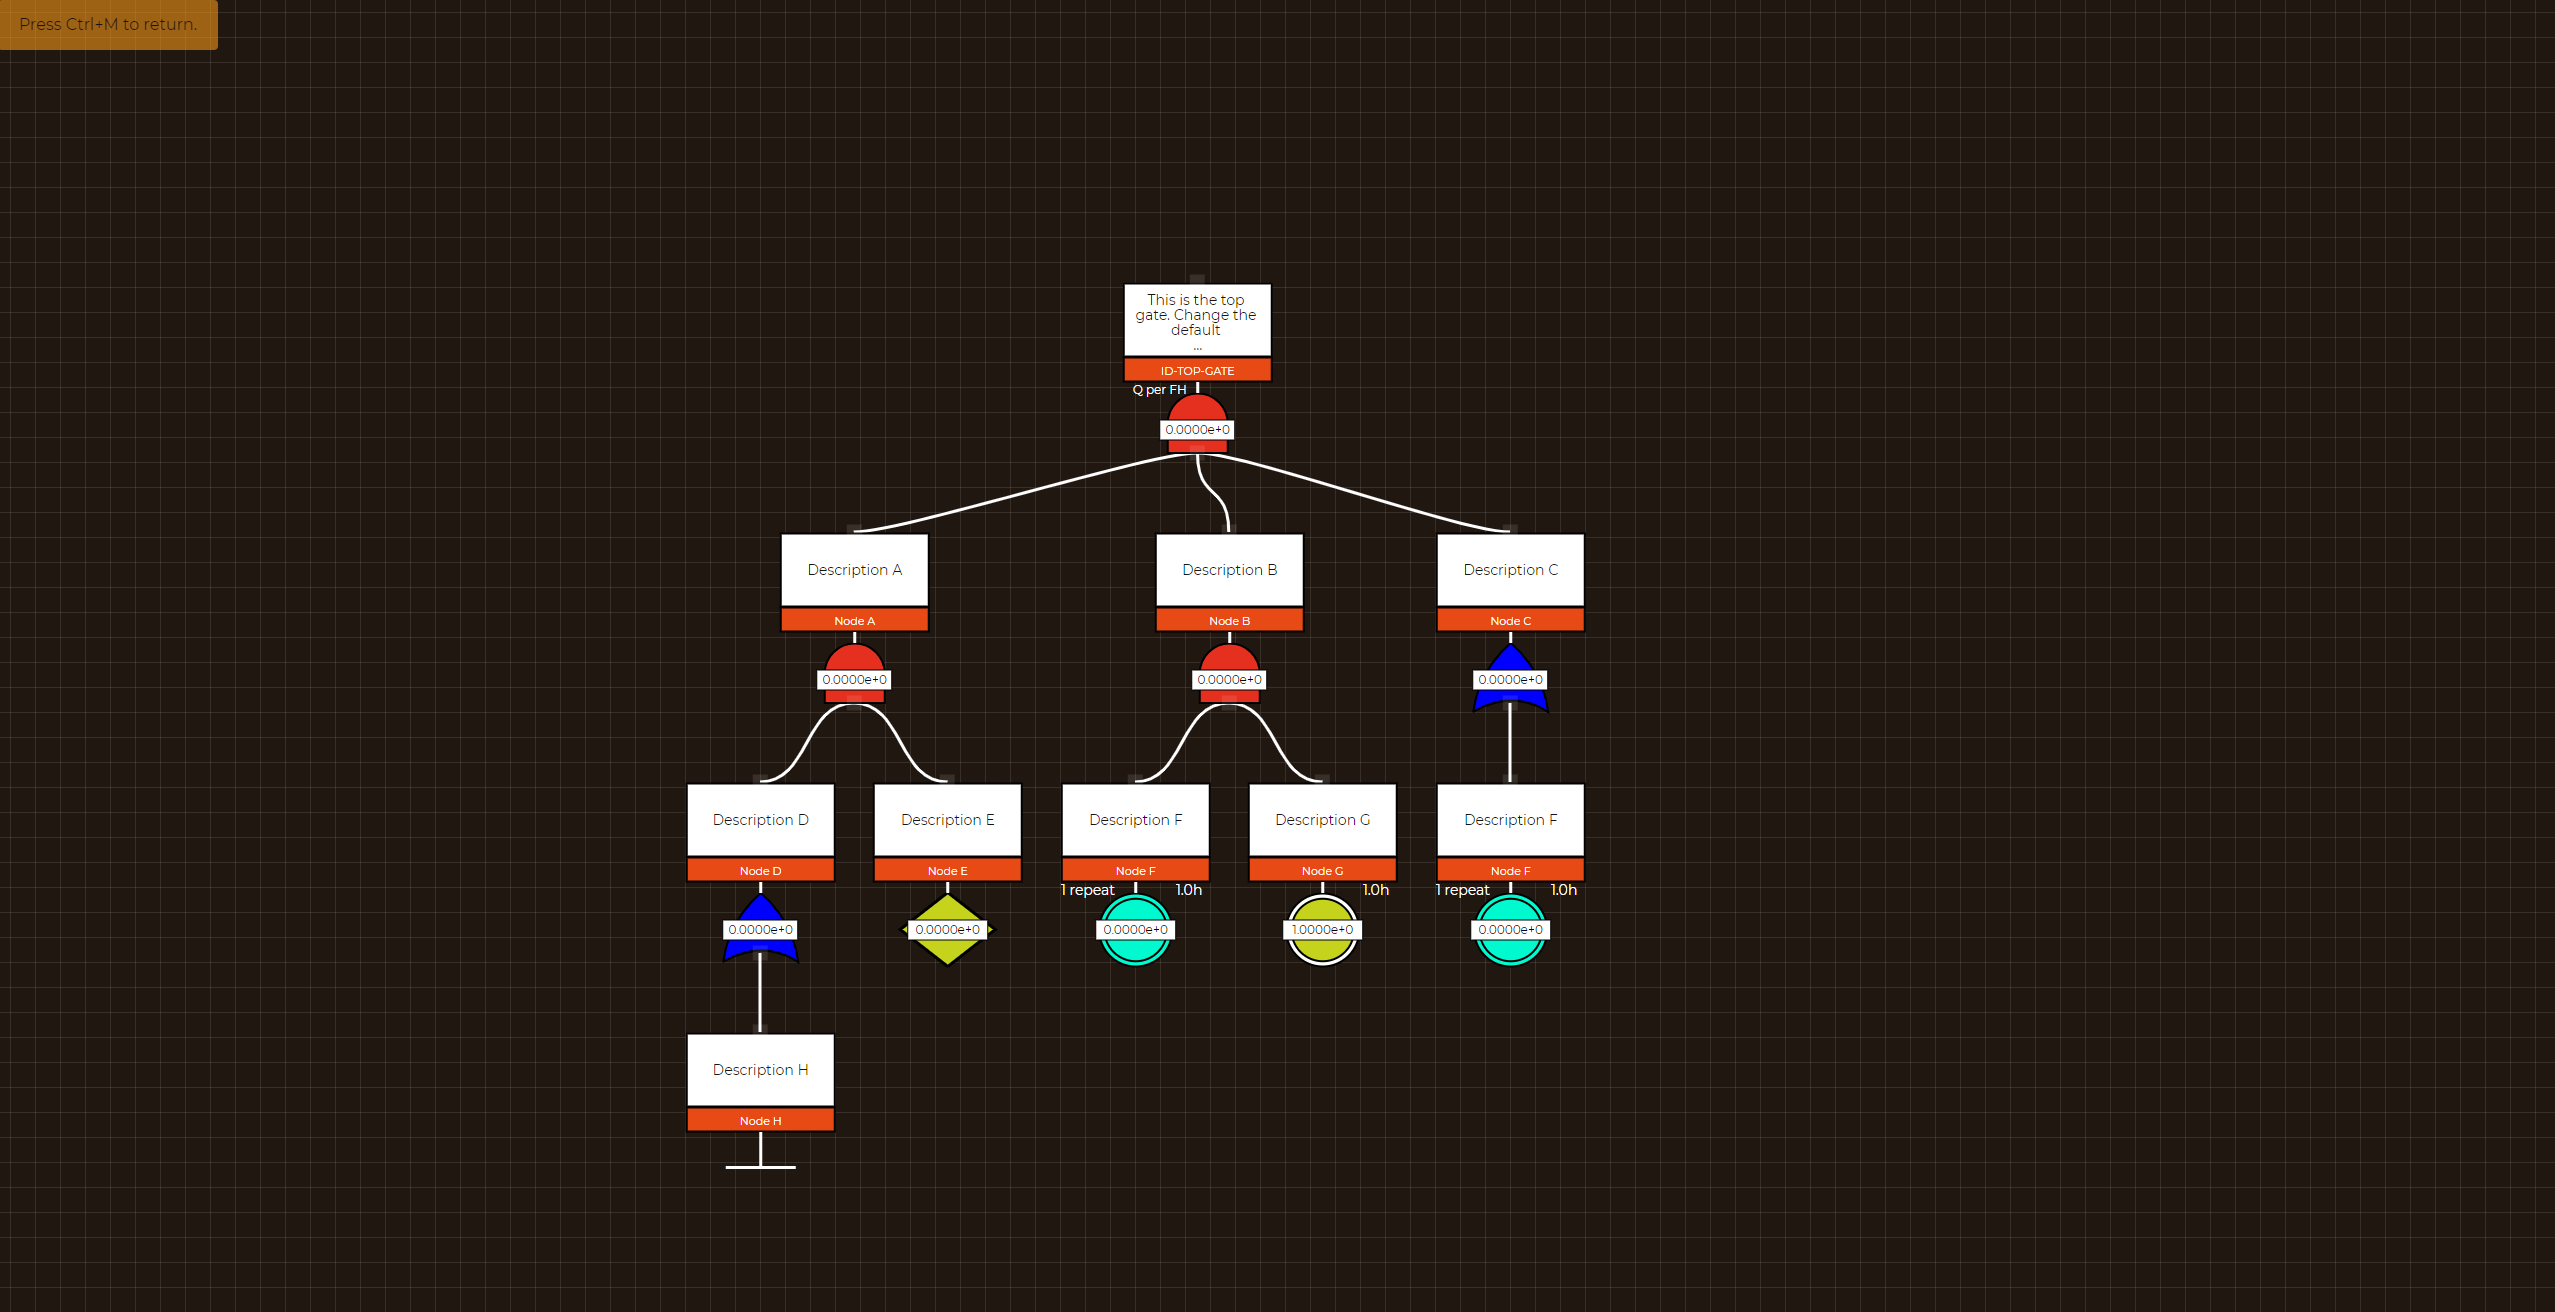
Add New Top Gate
The Top Gate is the gate where the breakdown analysis starts to develop. It gives the Unavailability of the system analyzed.
To add a new Top Gate, click on + Top Gate > AND Gate, + Top Gate > OR Gate or + Top Gate > Vote Gate to insert it as an AND, an OR or a Vote gate.
Note
When the Top Gate is created as a Vote gate, Robin asks for the value of the threshold K after the ID and the Description have been introduced. See the Computation section.
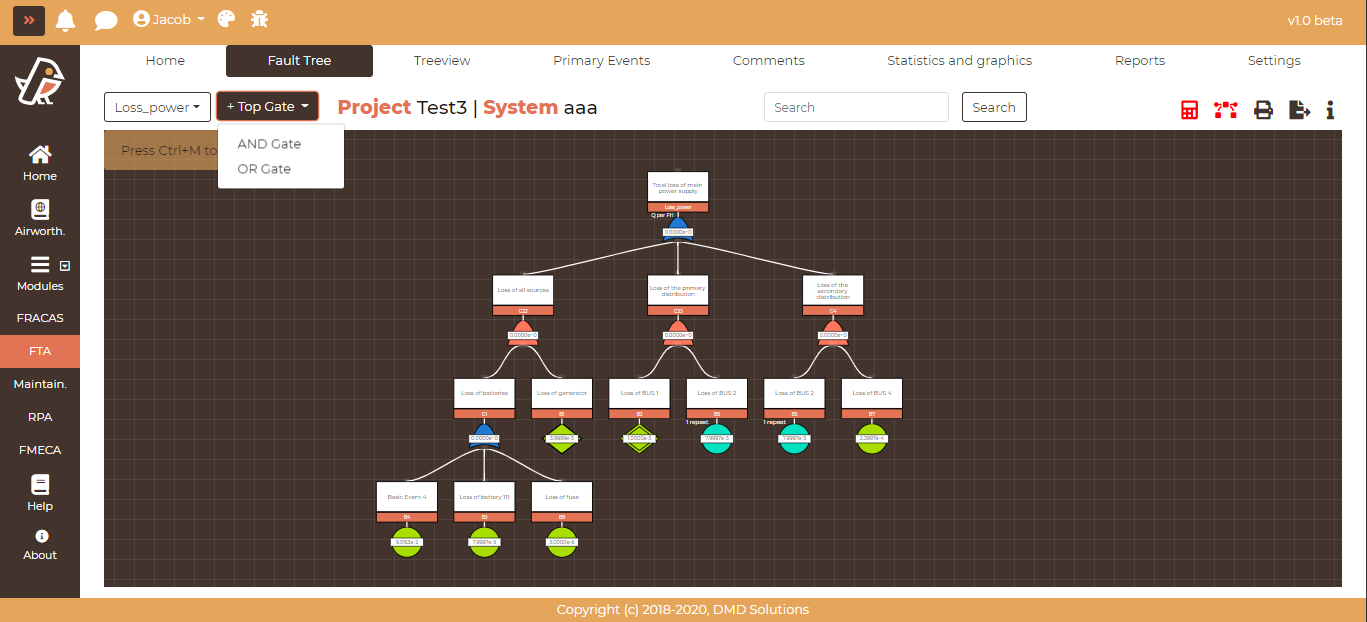
After clicking on the button, a new Top Gate will be created with a generic ID and Description.
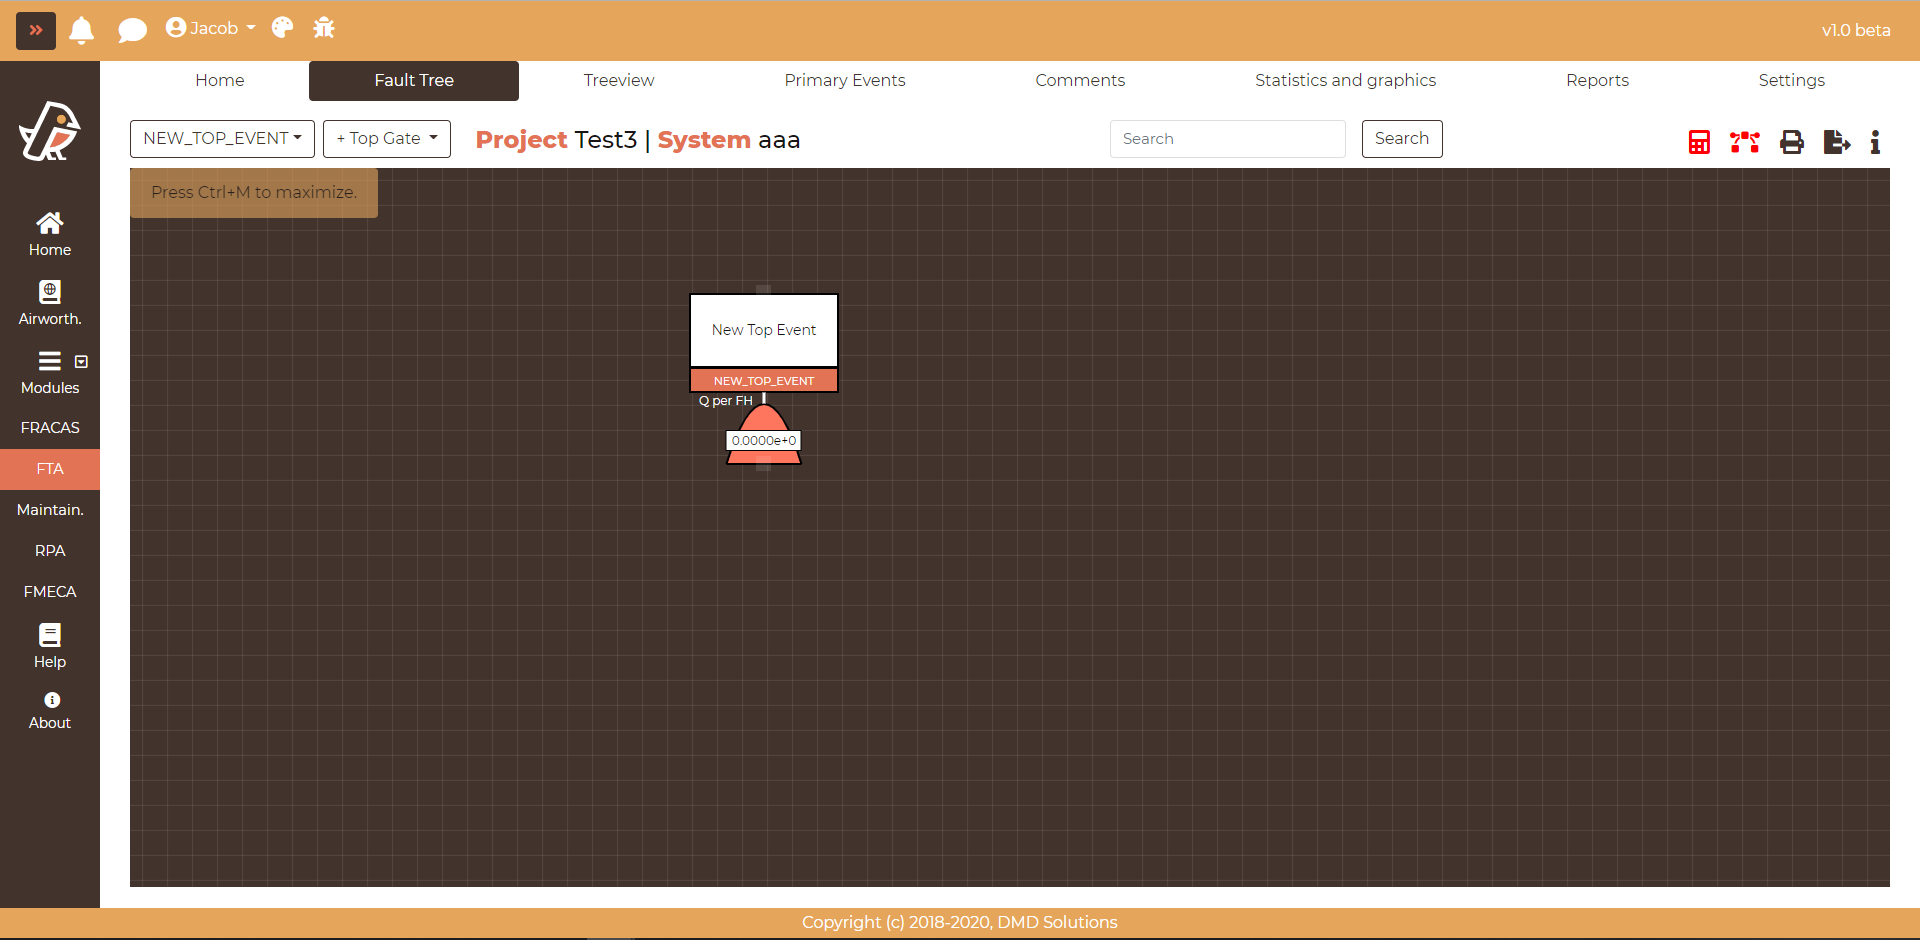
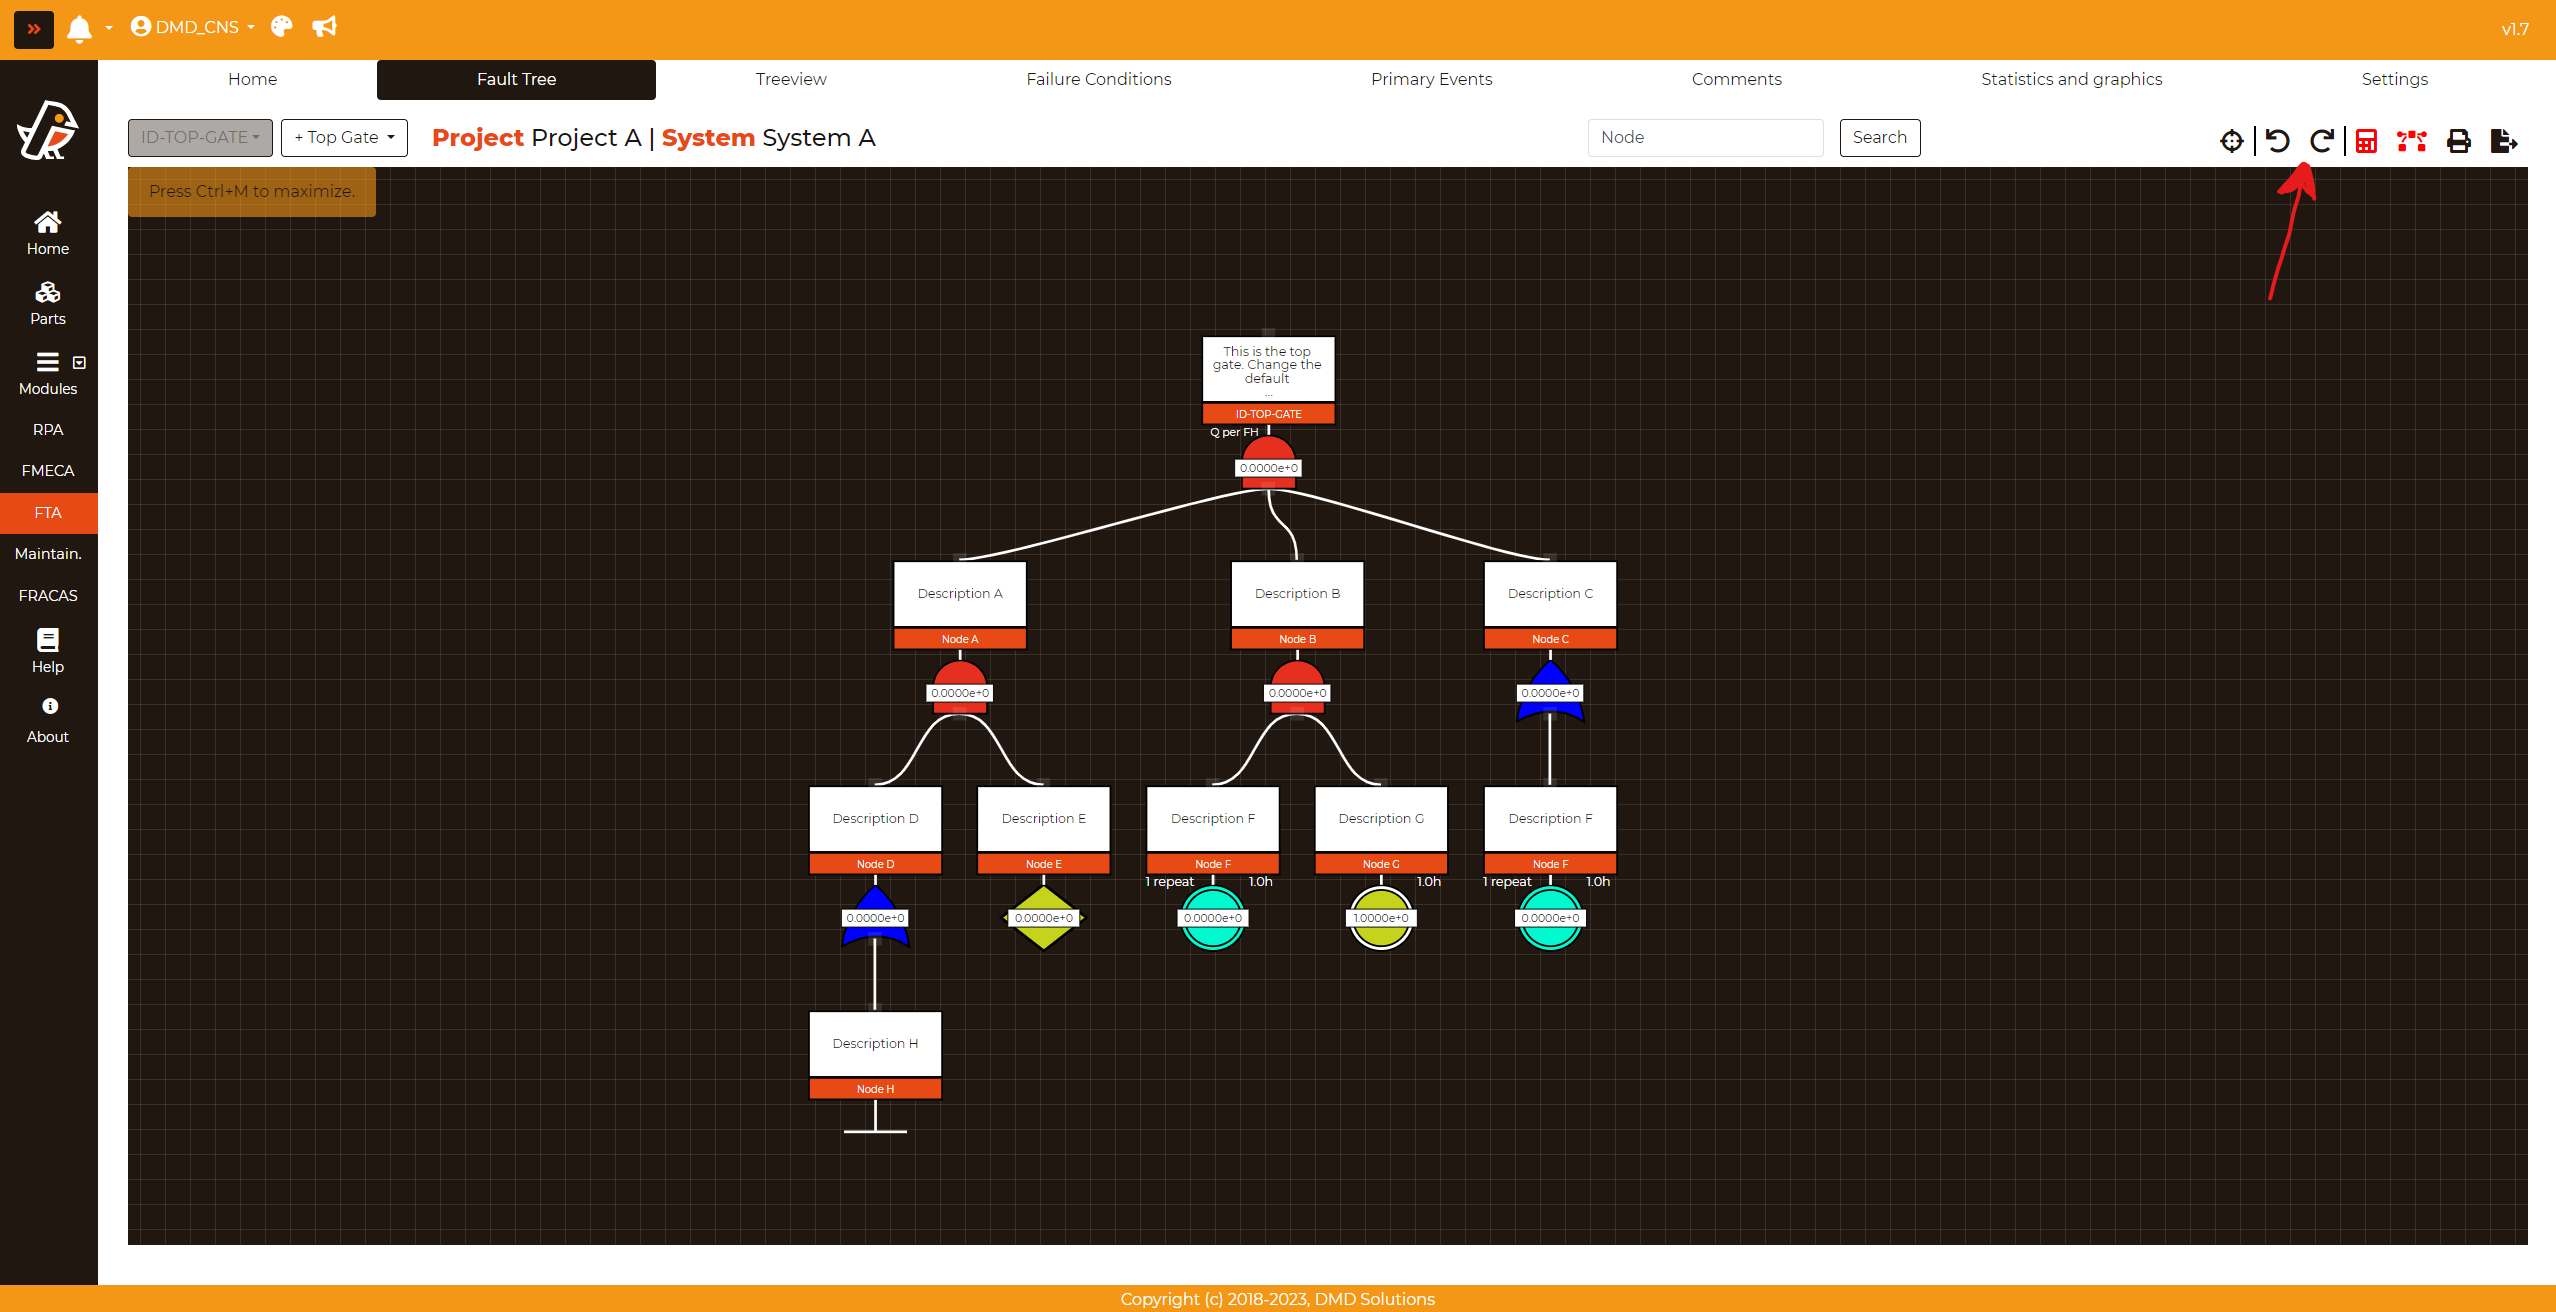
Center Top Gate in the diagram
Click the icon and the top gate will be centered in the diagram
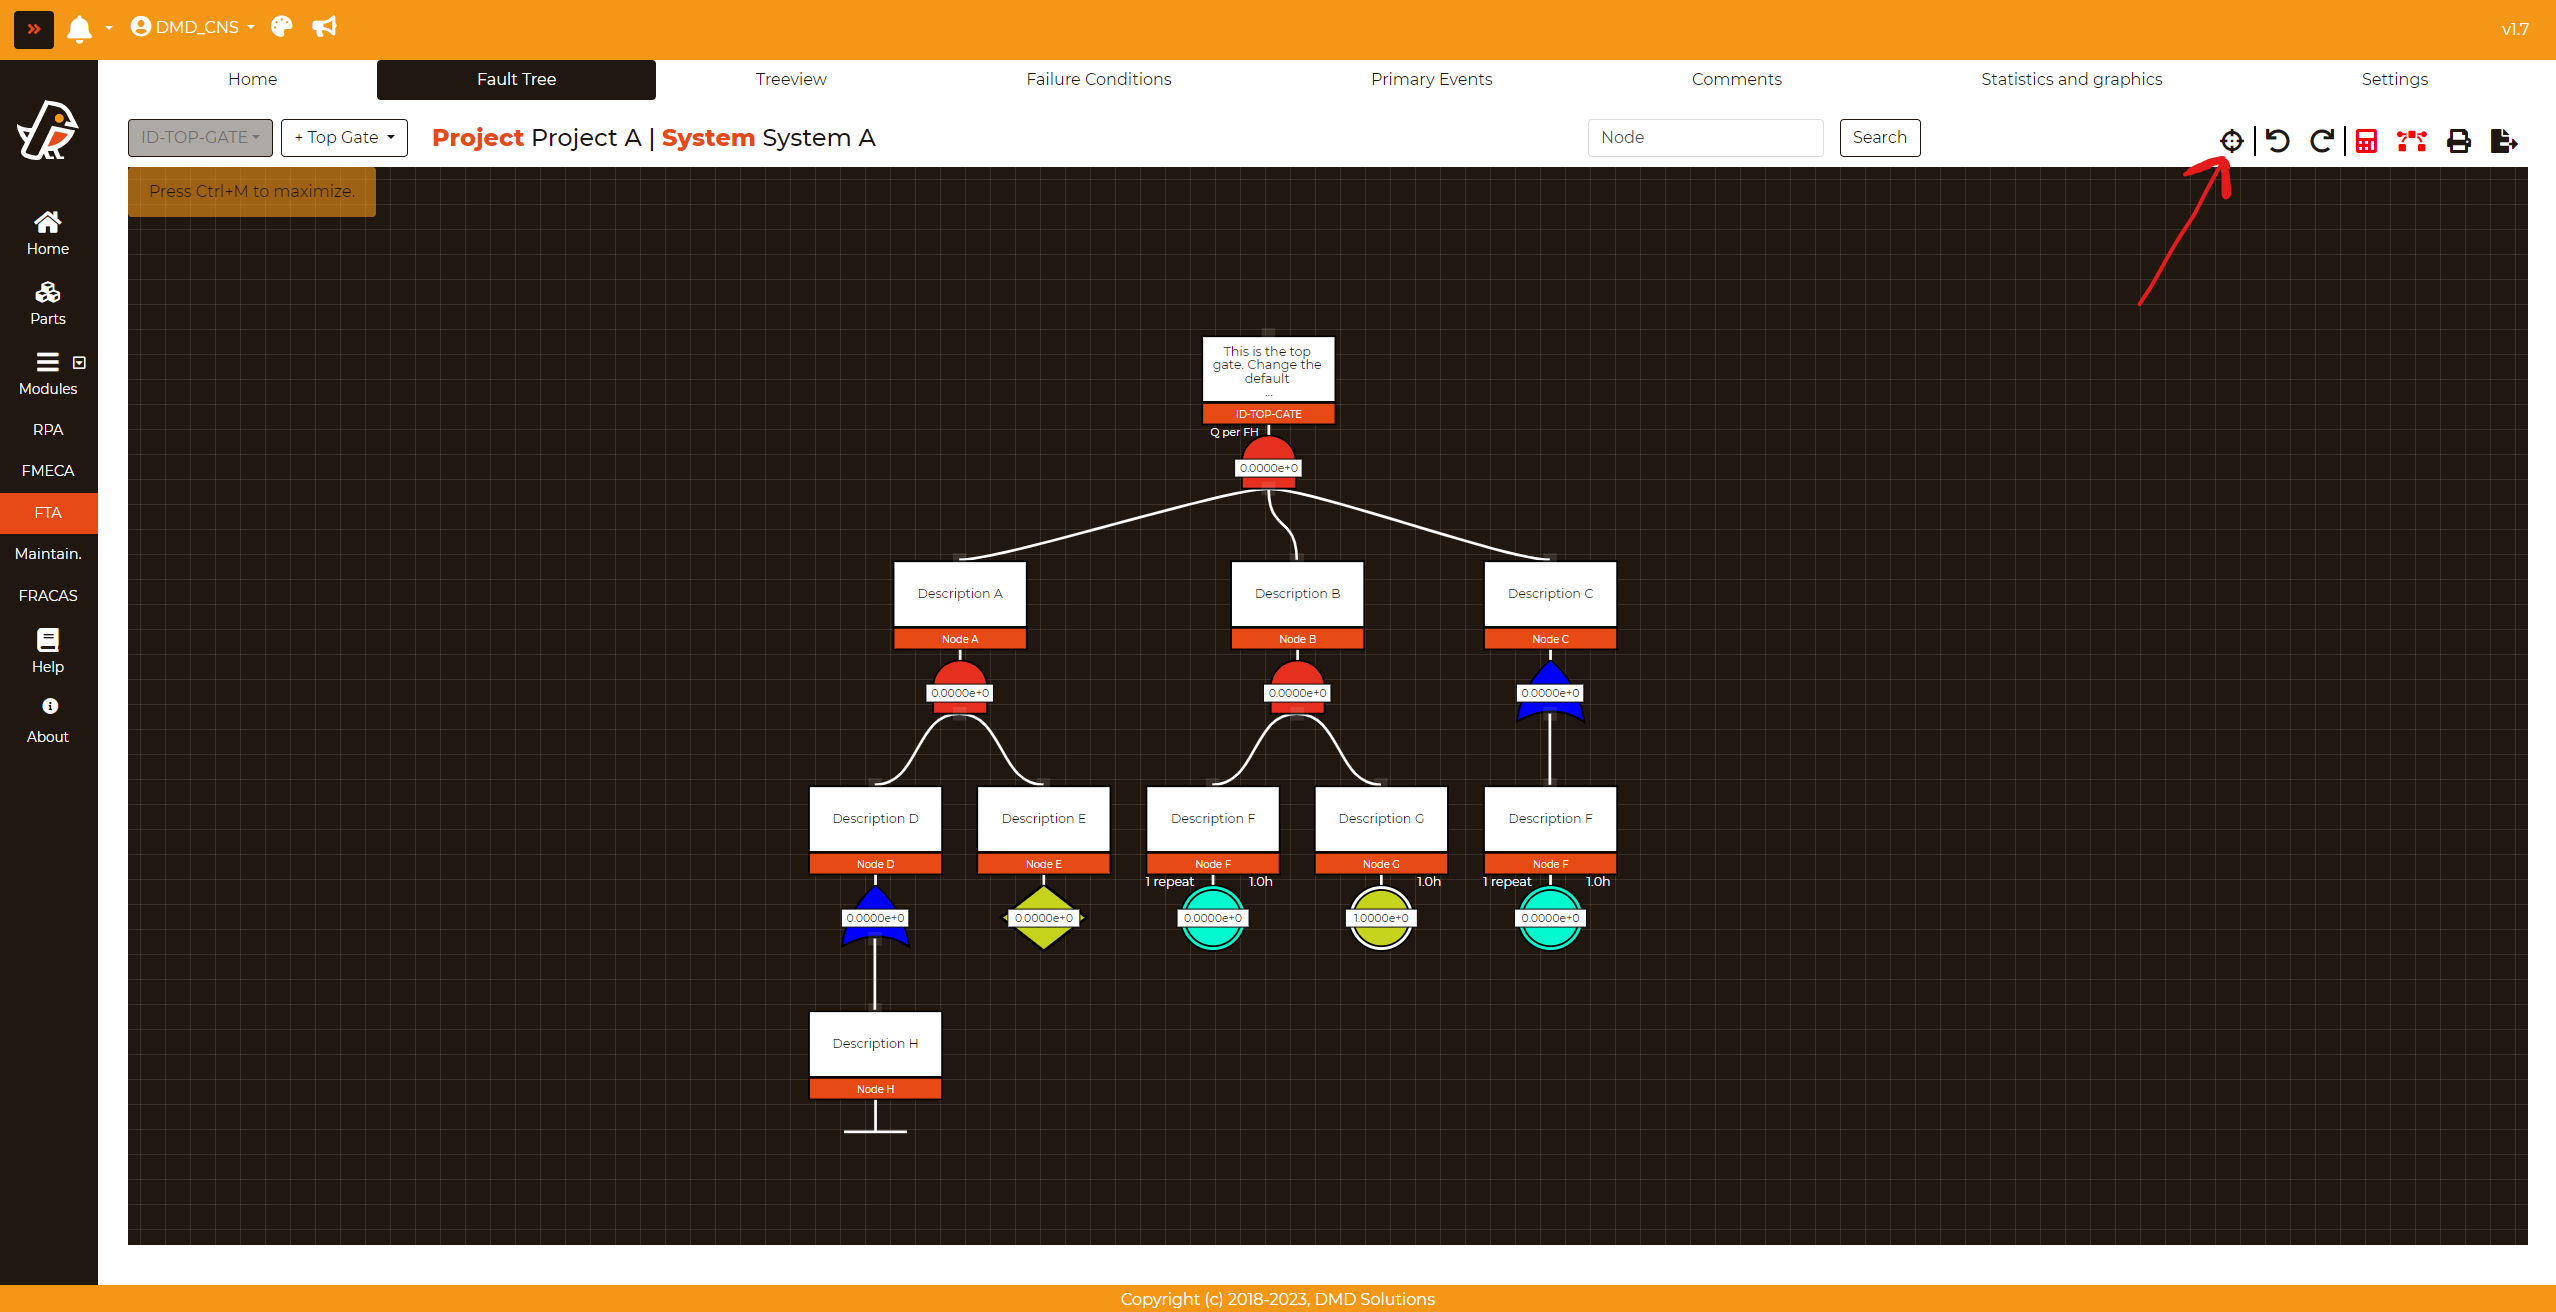
Undo and Redo Functionality in the diagram
How to Use Undo and Redo
Undo: To revert the most recent action, you can click on the undo icon in the toolbar. Alternatively, you can use the keyboard shortcut CTRL+Z.
Redo: To reapply an action that you’ve undone, click on the redo icon in the toolbar. The keyboard shortcut for this function is CTRL+Y.
An “action” refers to any modification made to the nodes within the diagram (i.e: add a child node, change a node parameter, delete a node, etc.)
Right-Click actions
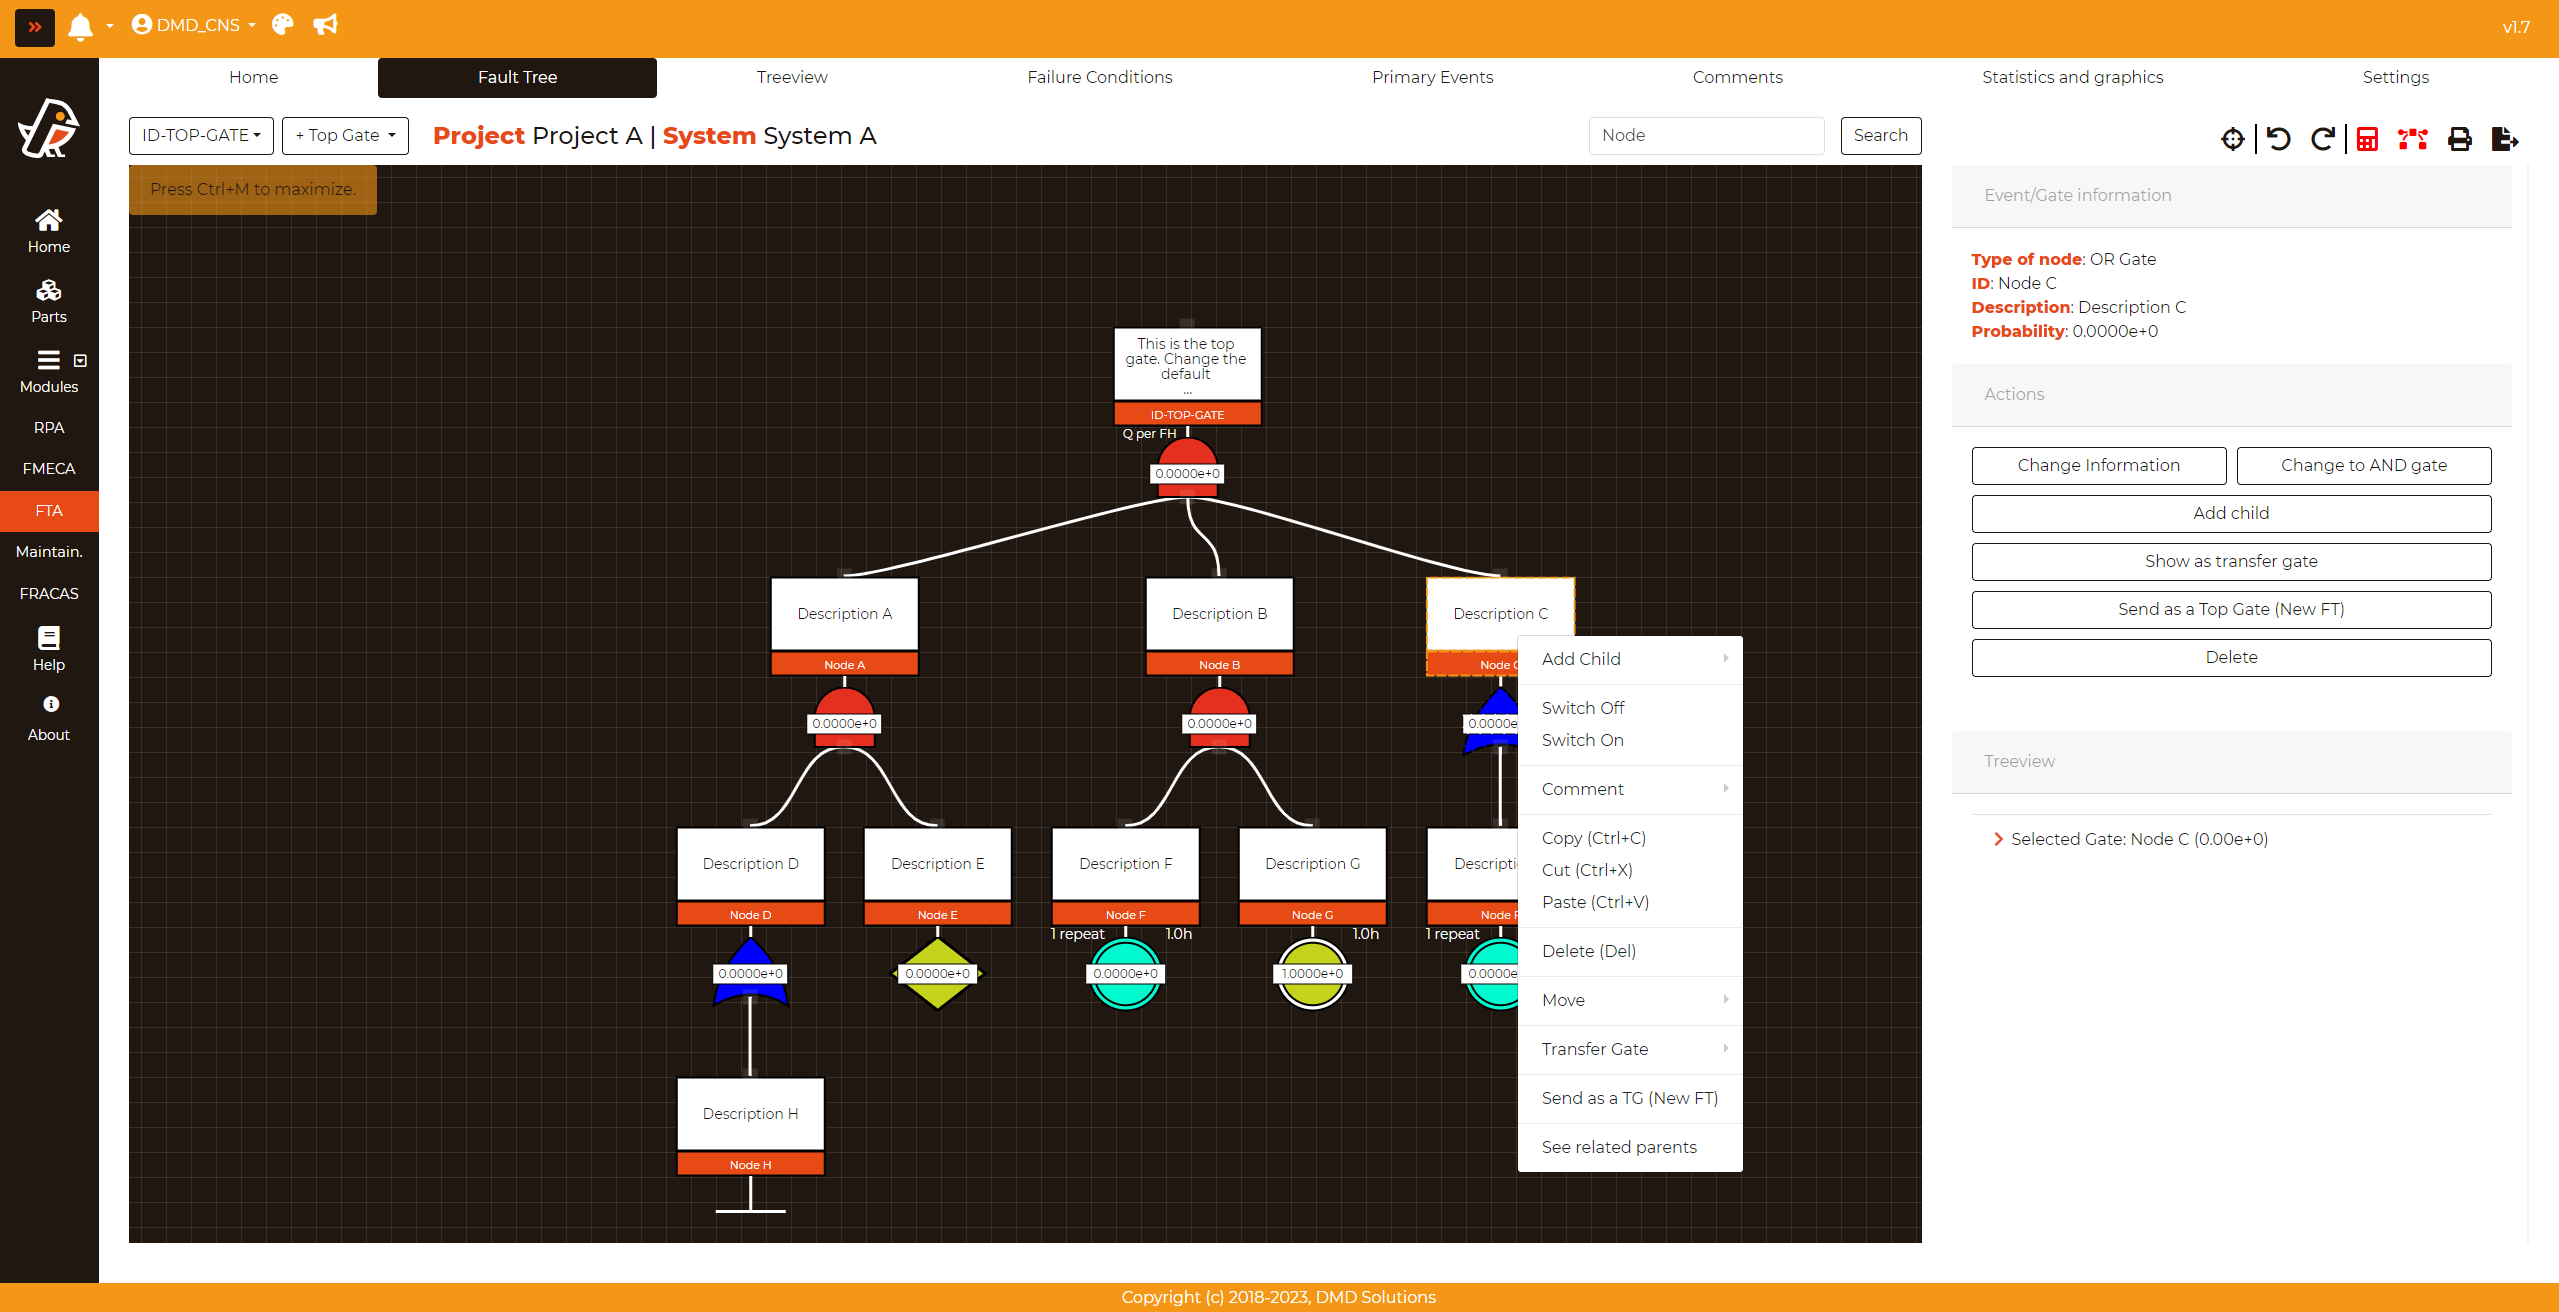
A. Add Child
Nodes can be added directly with this right click option. Detailed explanation is in Node Actions section. Detailed information about add child is handled in the section Node Actions
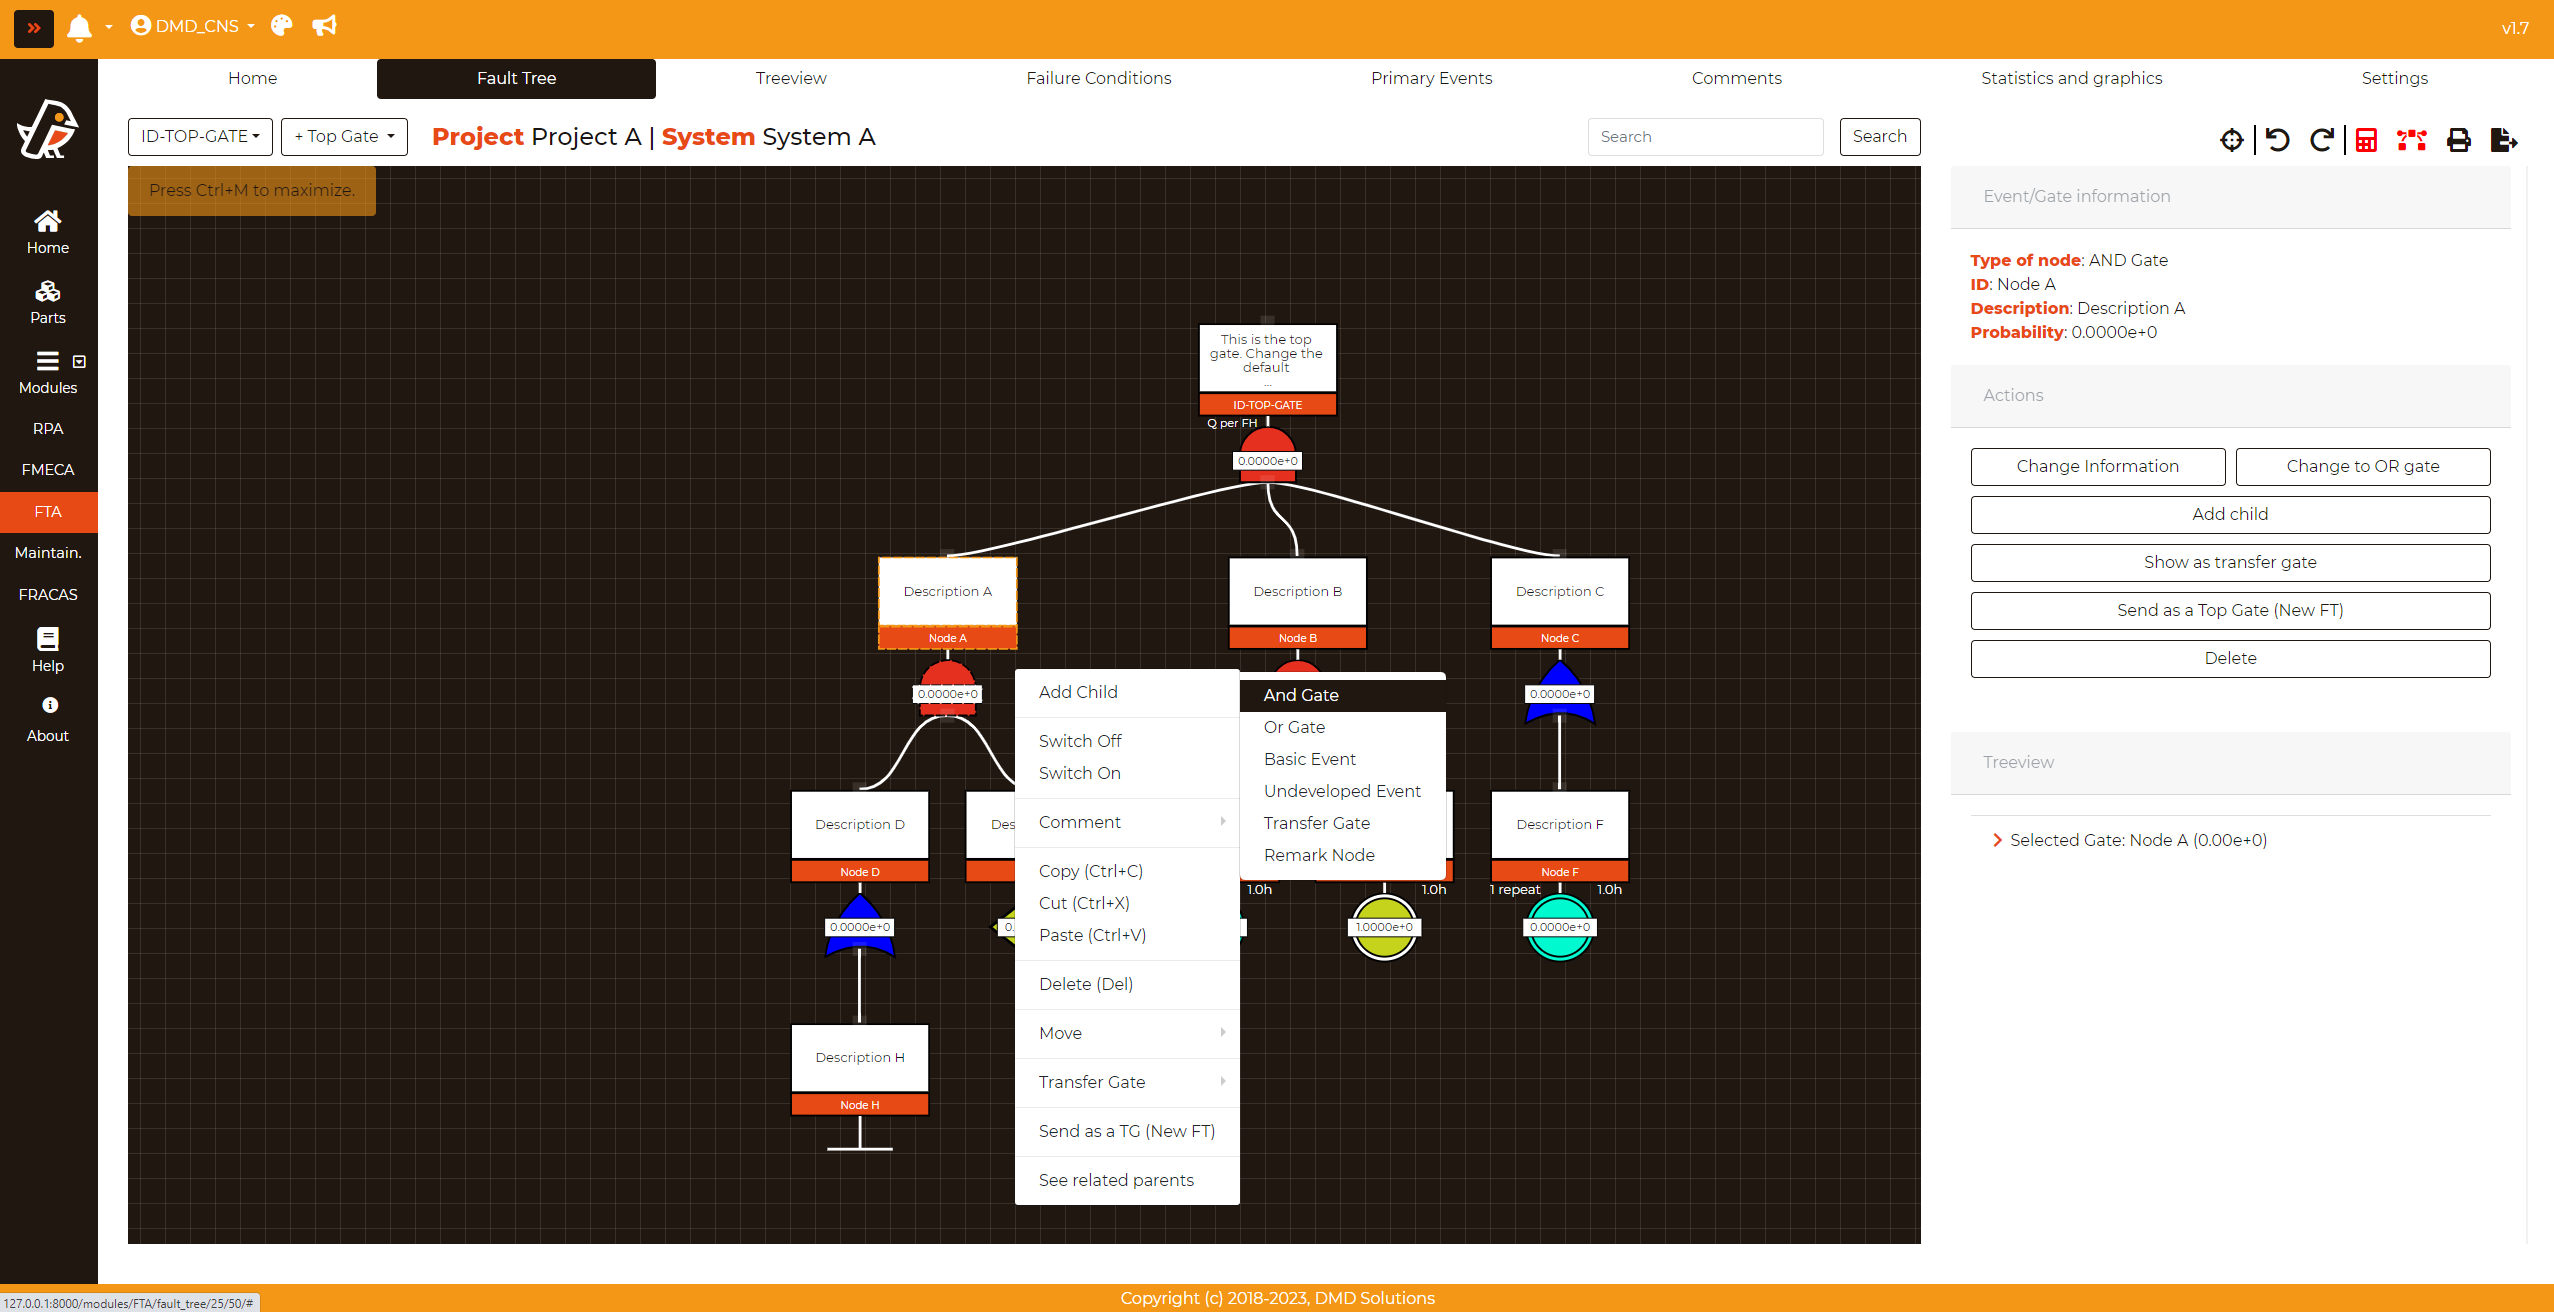
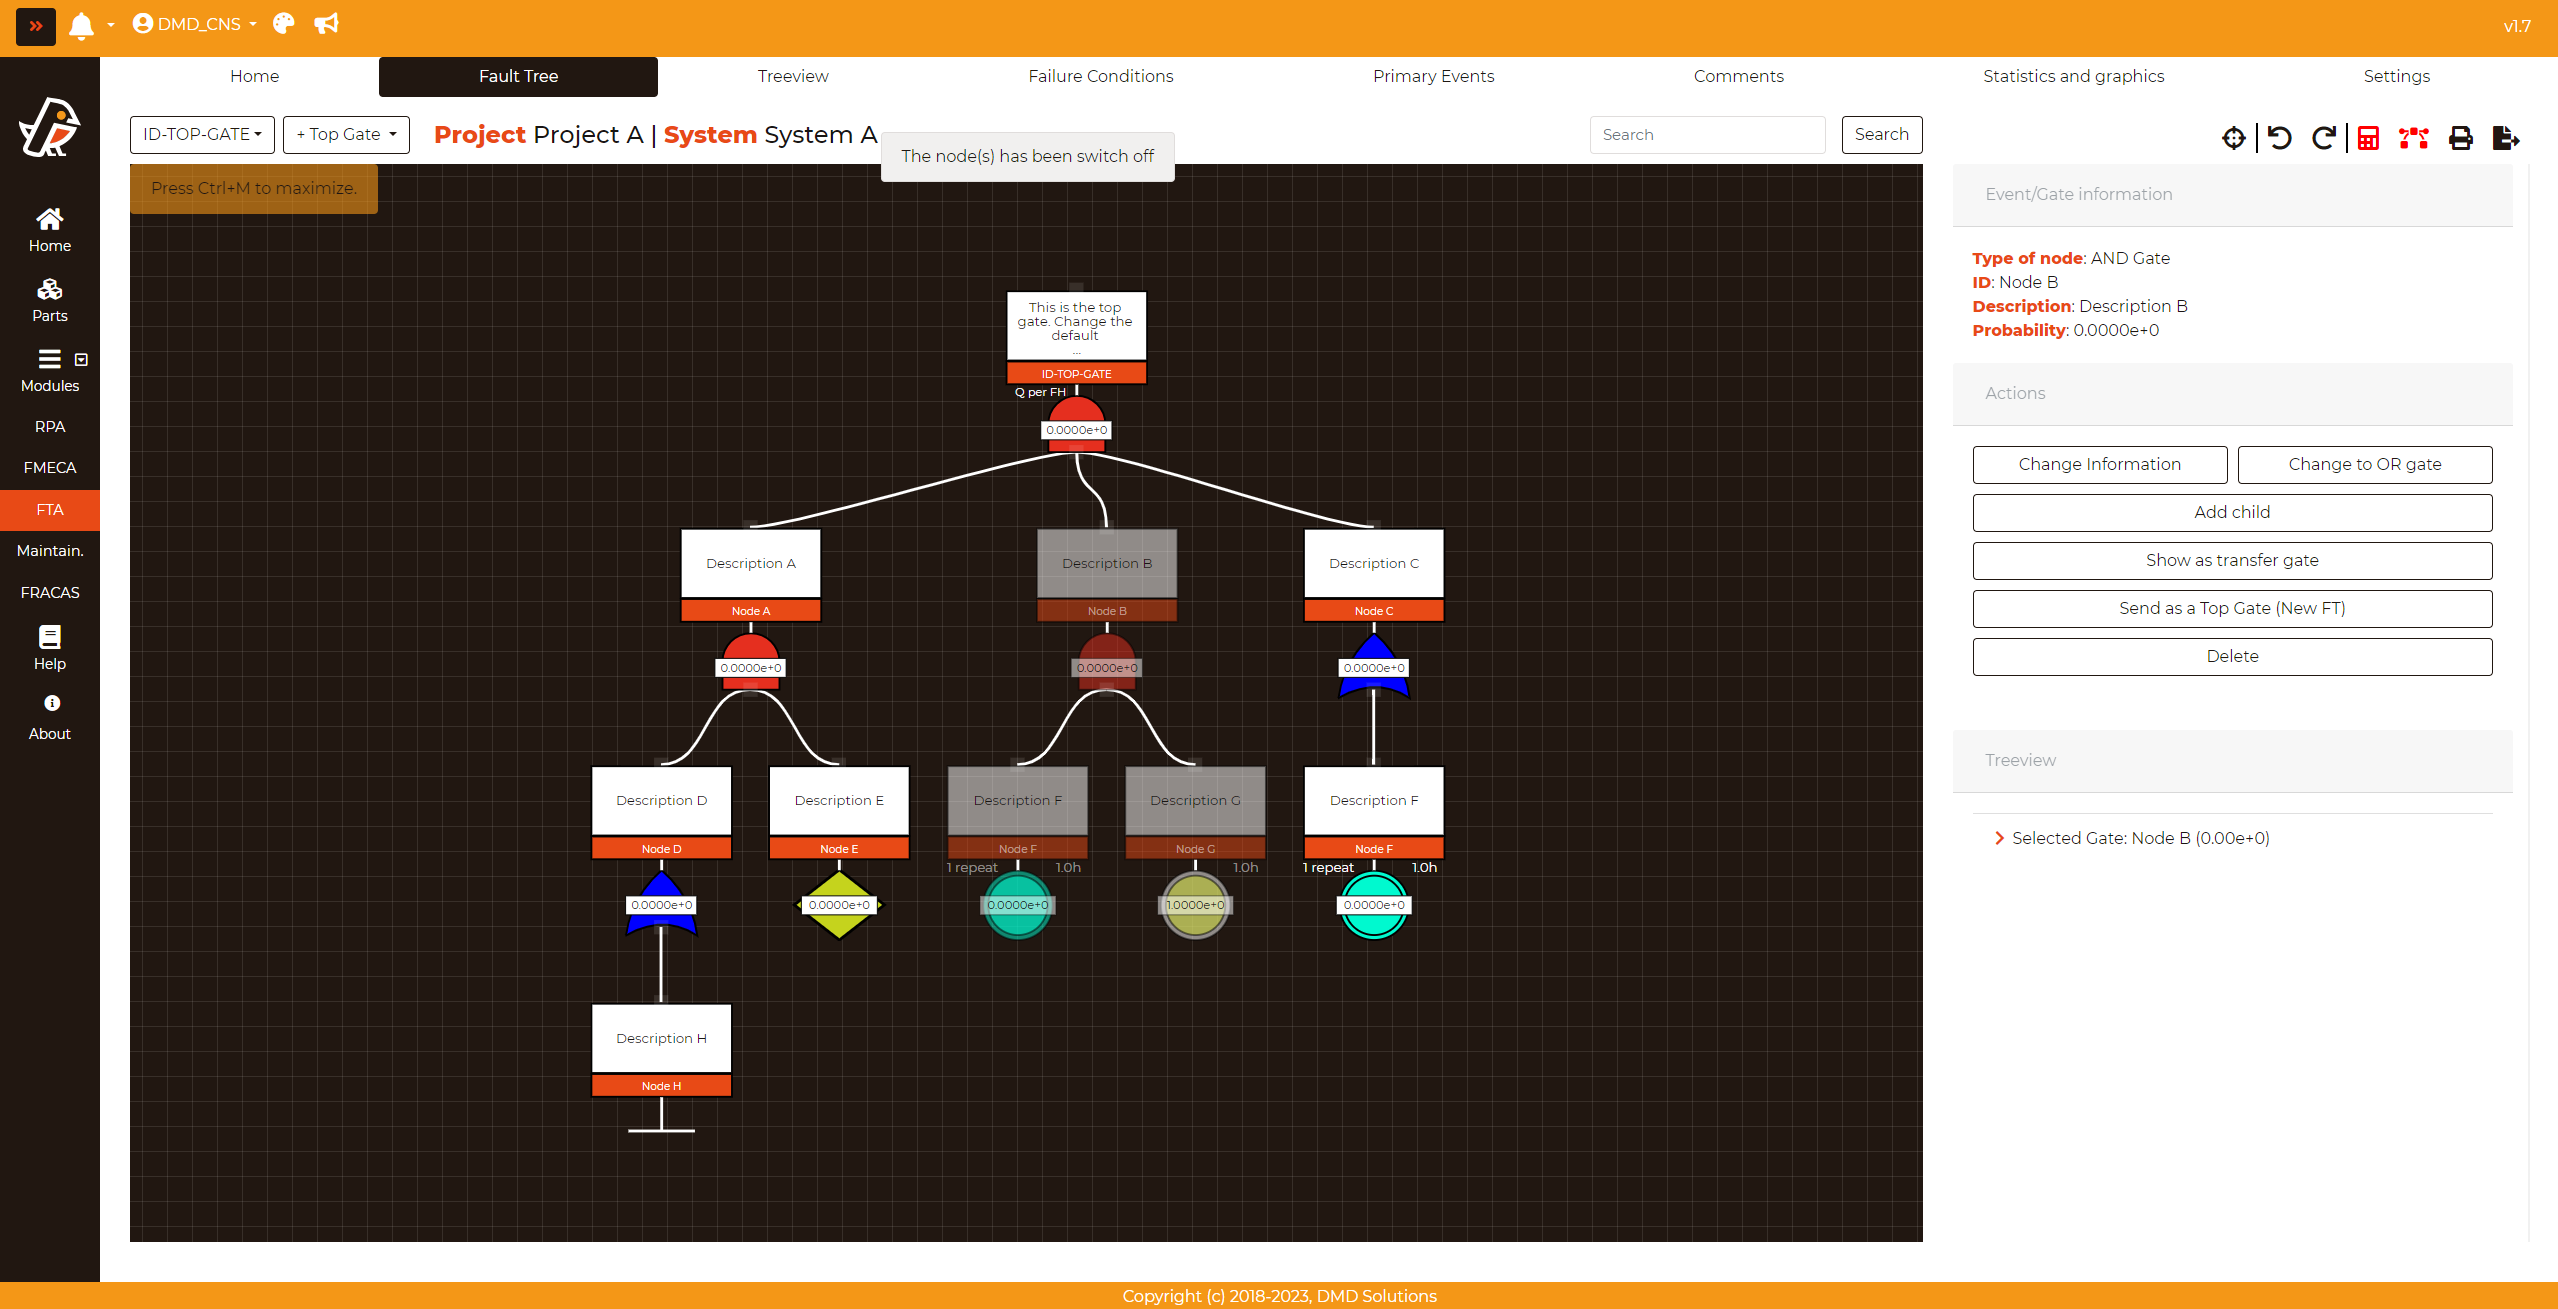
B. Switch On/Off
Switch Off: It changes the selected node and its children nodes in switch-off status
Switch On: It changes the selected node and its children nodes in switch-on status
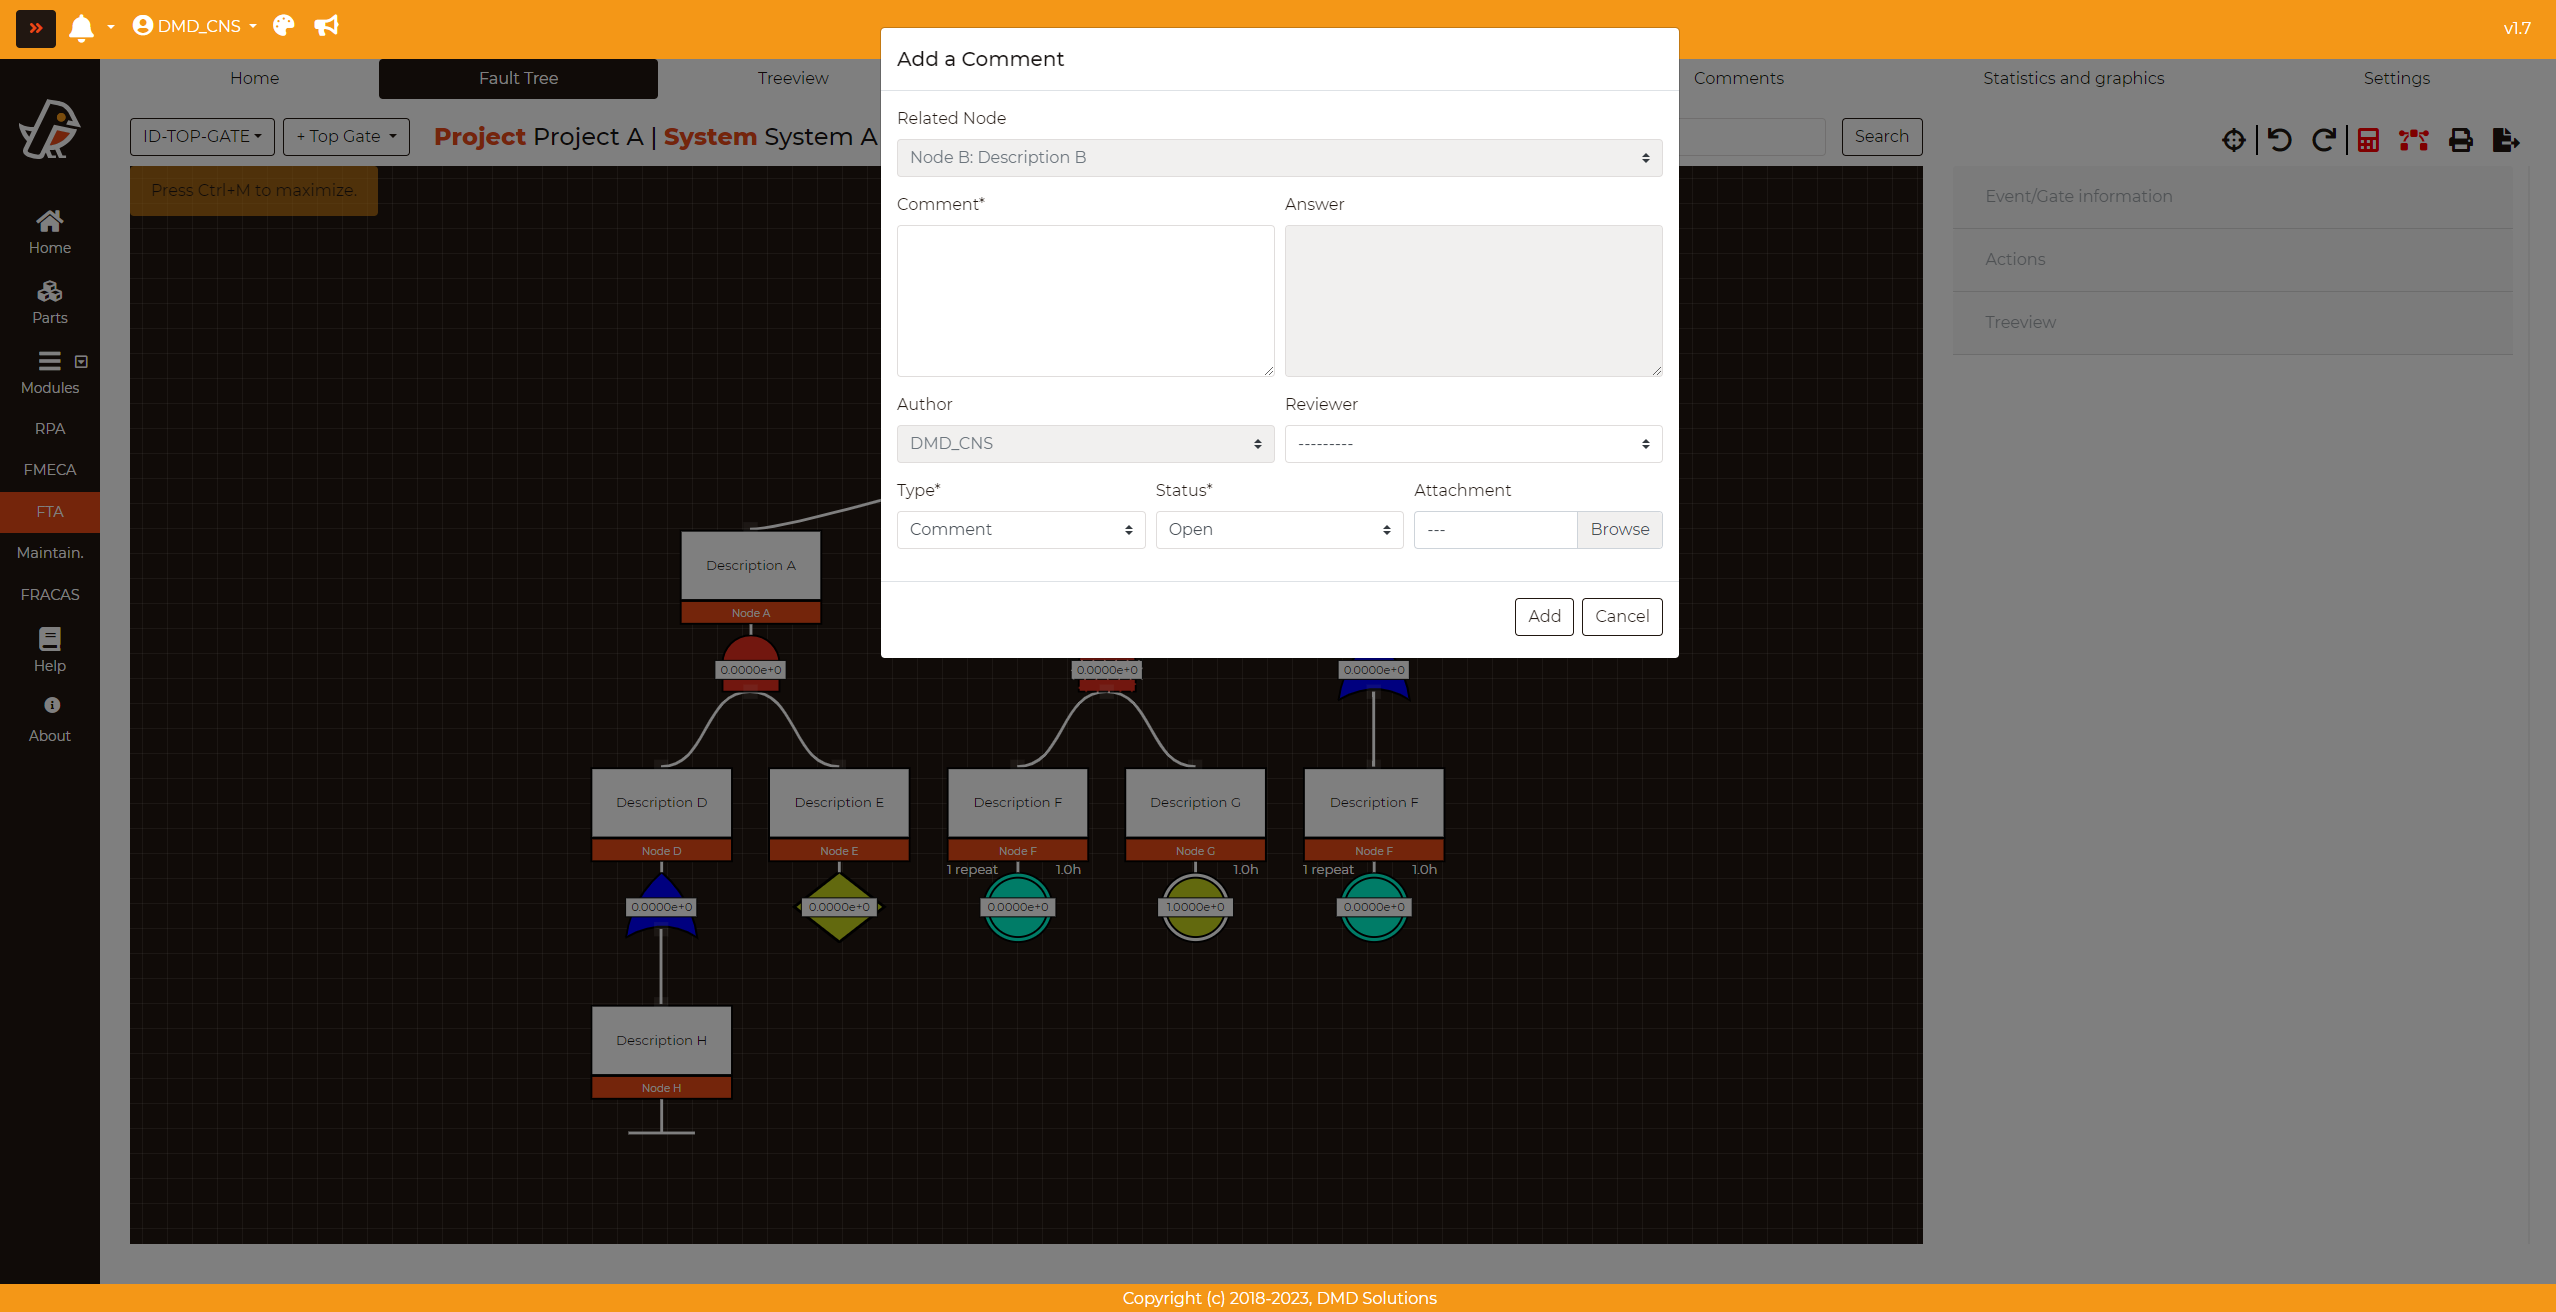
C. Comment
The user can add/edit/see/delete the comment of a node.
It can be done through a modal directly or being redirected to another page where comments are handled
Below image is showing the add comment modal
D. Copy/Cut/Paste
Copy: When a user uses the “Copy” function, a duplicate of the selected node along with its child nodes is created.
The original node and its child nodes remain unchanged in their original location.
This is essentially a non-destructive operation that leaves the original structure intact.
It can also be used by the keyboard shortcut CTRL+C
Cut: When a user uses the “Cut” function, removes the selected node and its child nodes from their current location while storing them temporarily so they can be pasted elsewhere.
This is a destructive operation that alters the original structure by removing the selected nodes.
It can also be used by the keyboard shortcut CTRL+X
Paste: It attaches the previously copied or cut nodes, along with their respective child nodes, to a different target node.
This allows you to effortlessly move or duplicate complex node structures within the system, preserving their internal relationships.
It can also be used by the keyboard shortcut CTRL+V
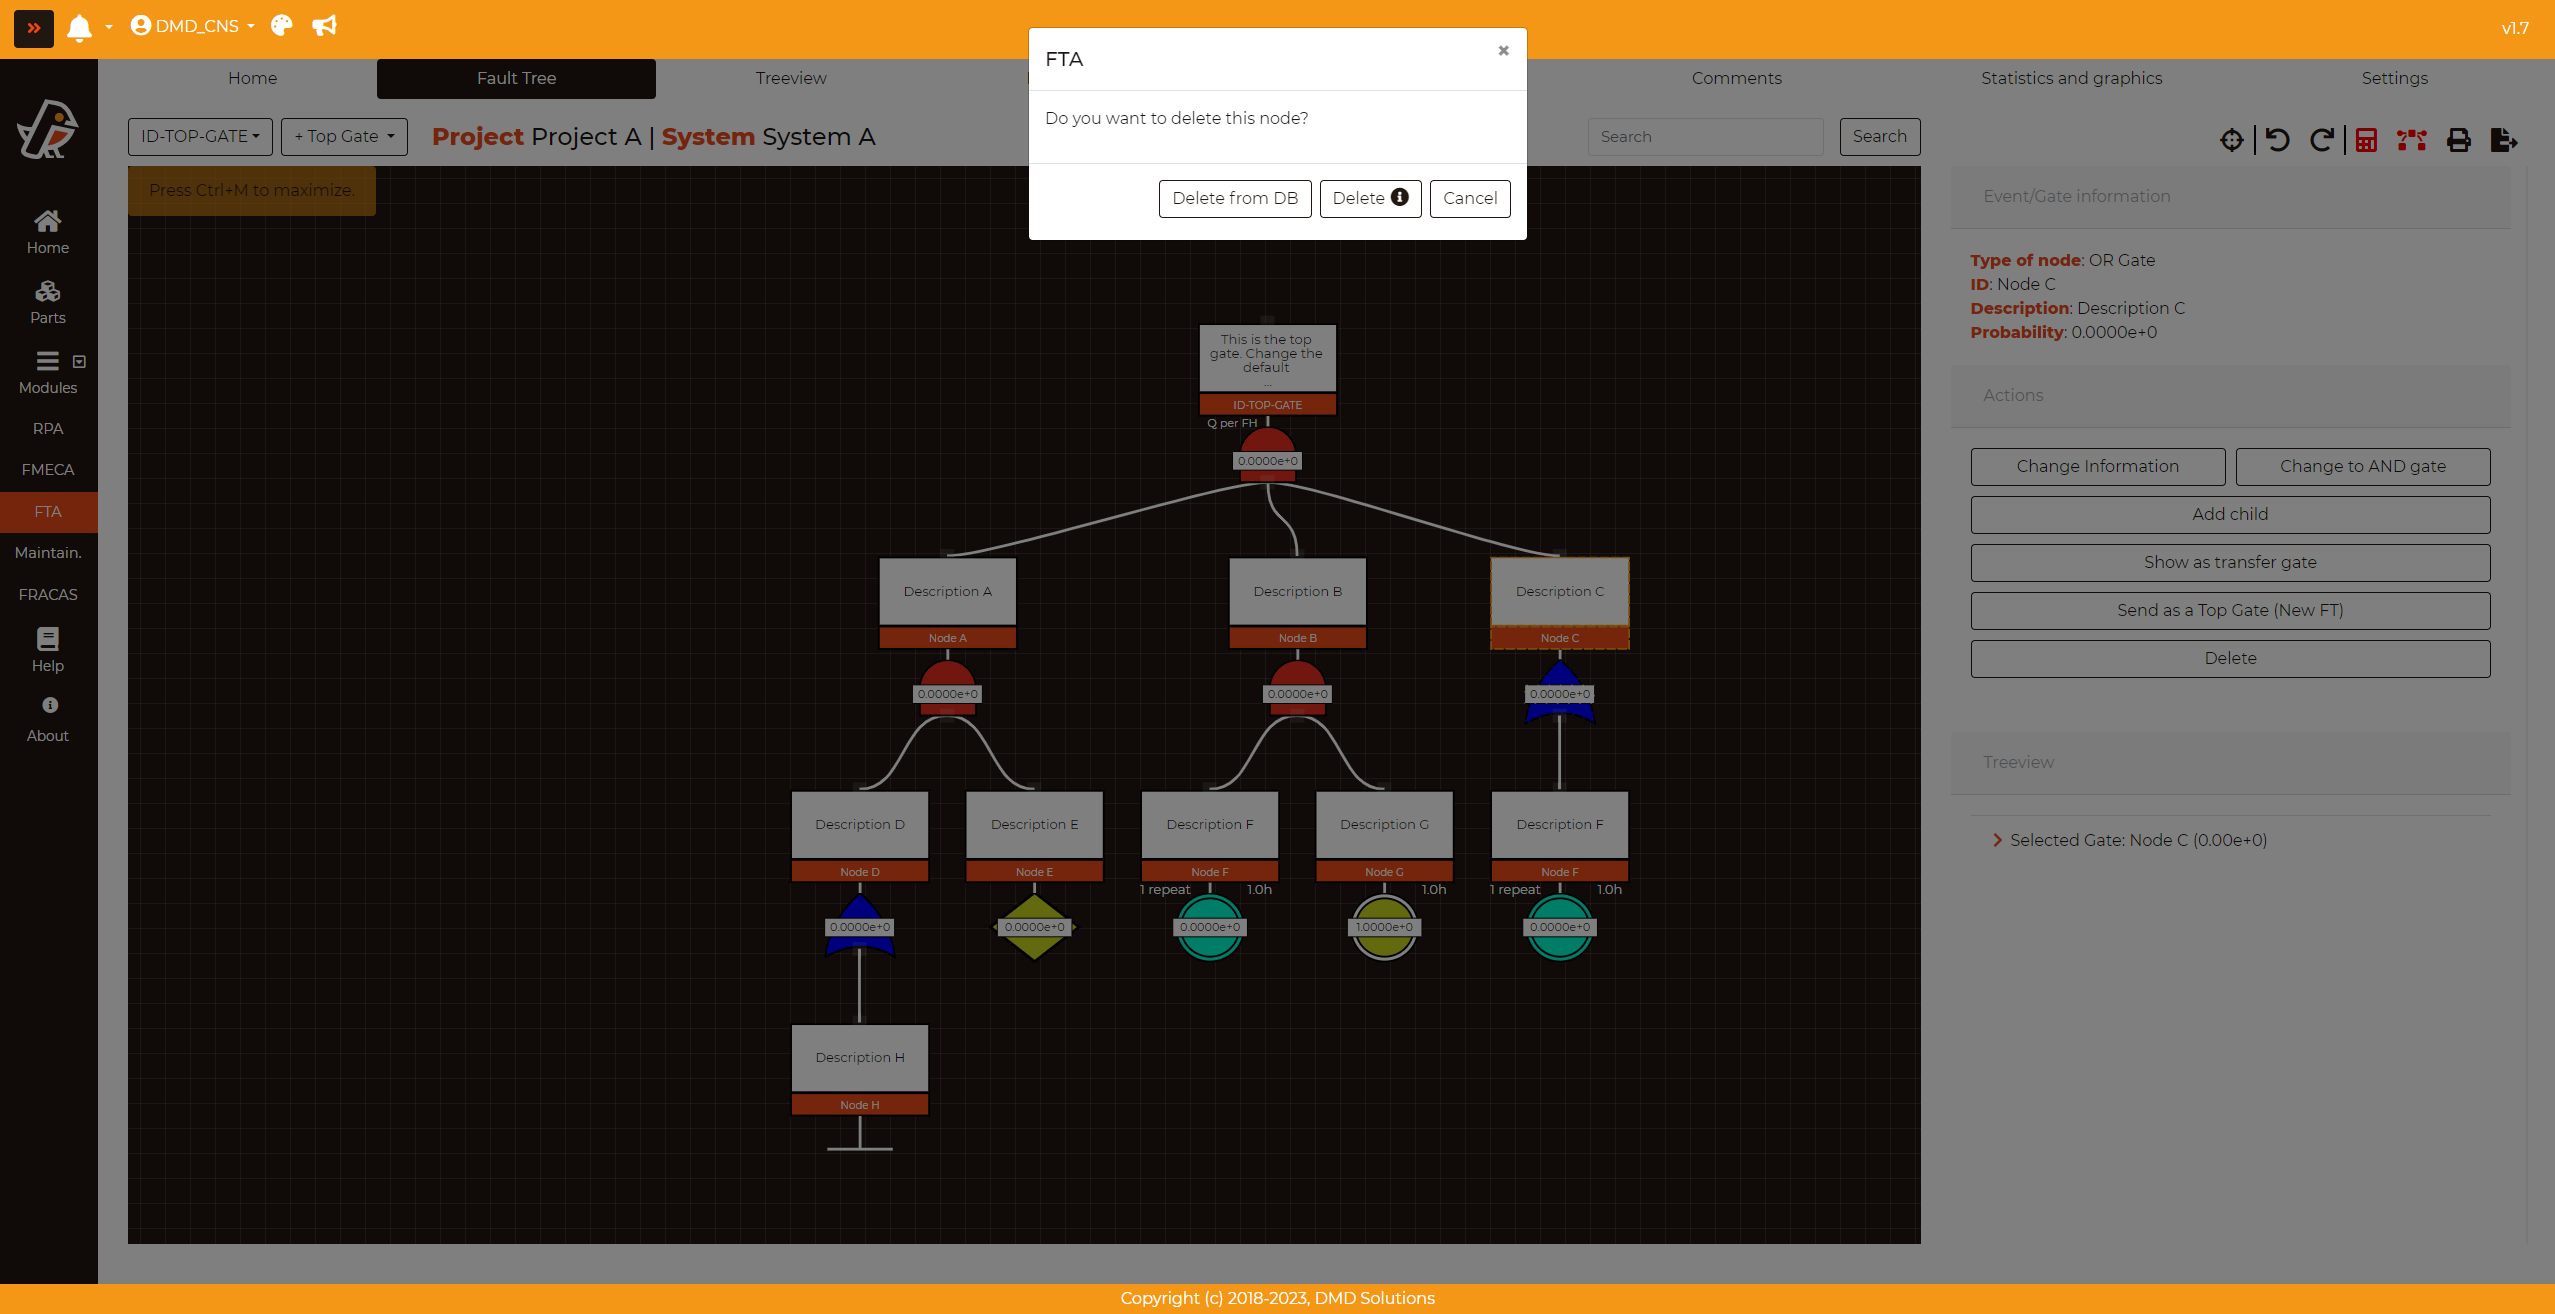
E. Delete
When a user deletes a node, a modal is displayed and need to choose the delete-option:
Delete from DB: The node is deleted both in the fault tree and in the database.
Delete: The node is deleted only from the tree and deleted node information can be used anytime.
F. Move left/right
This function is used to change the position of the node among sibling nodes.
It can also be used by the keyboard shortcut CTRL+Left/Right
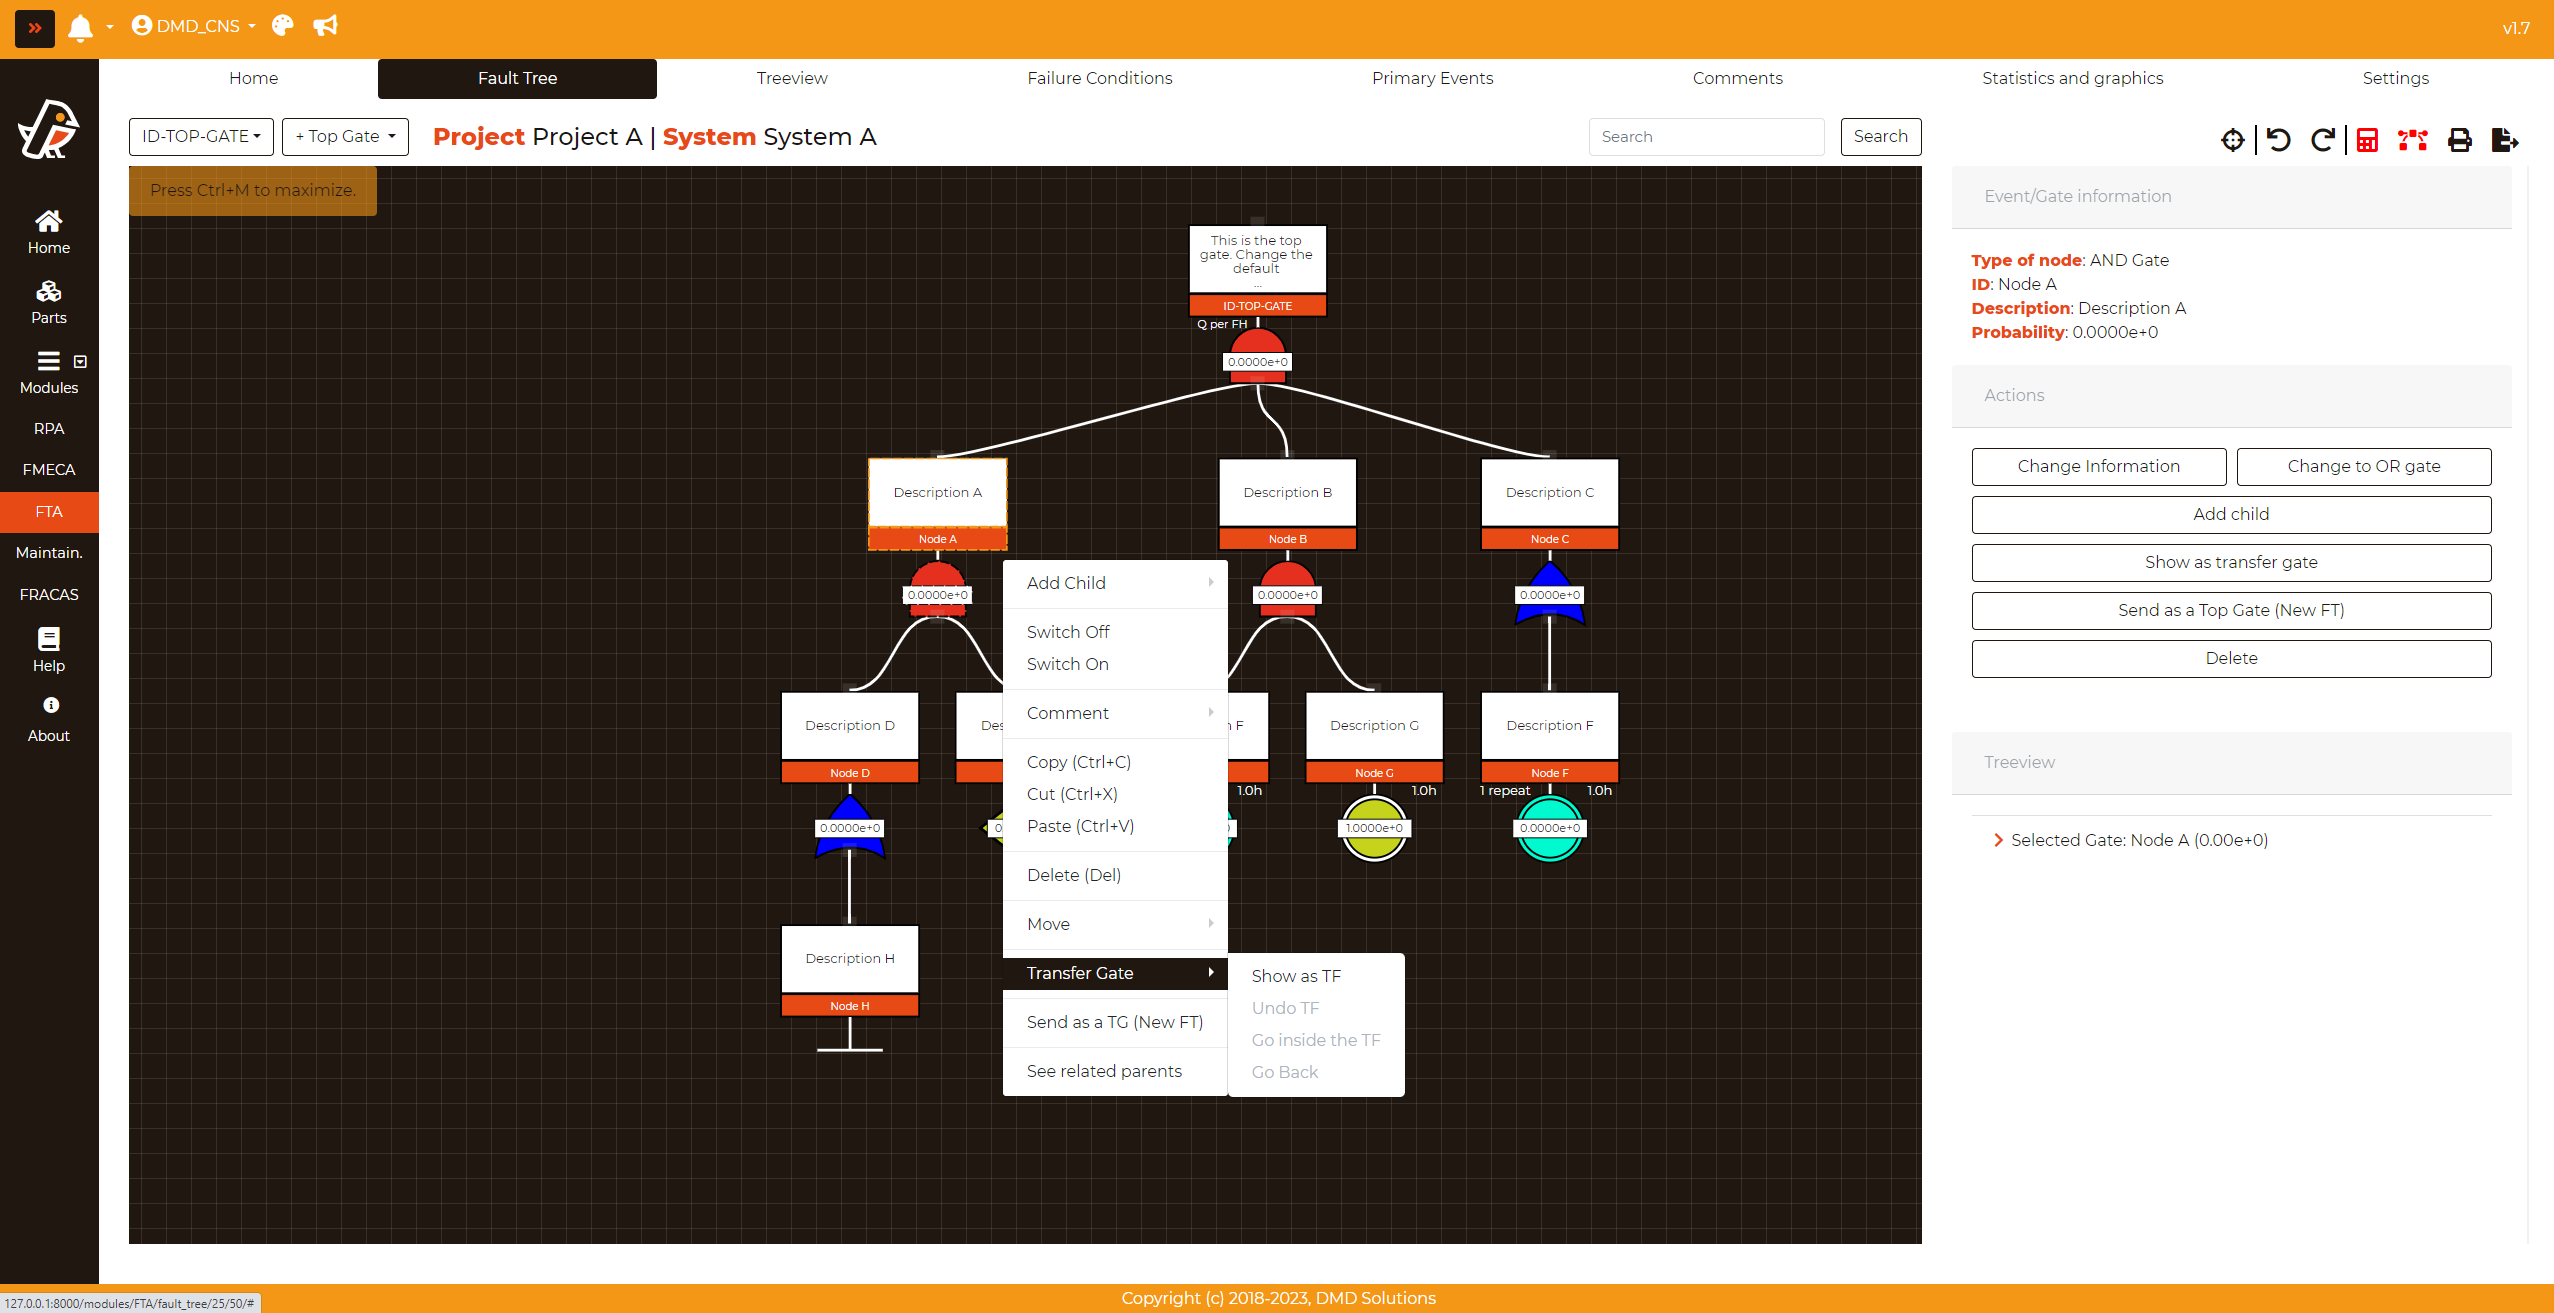
G. Transfer Gate
Users can perform transfer gate related actions with right click.
Detailed explanation about its functionality can be found in the section of Node Actions
H. Send as TG (New FT)
This option allows user to create a new Fault Tree with the selected node as top gate
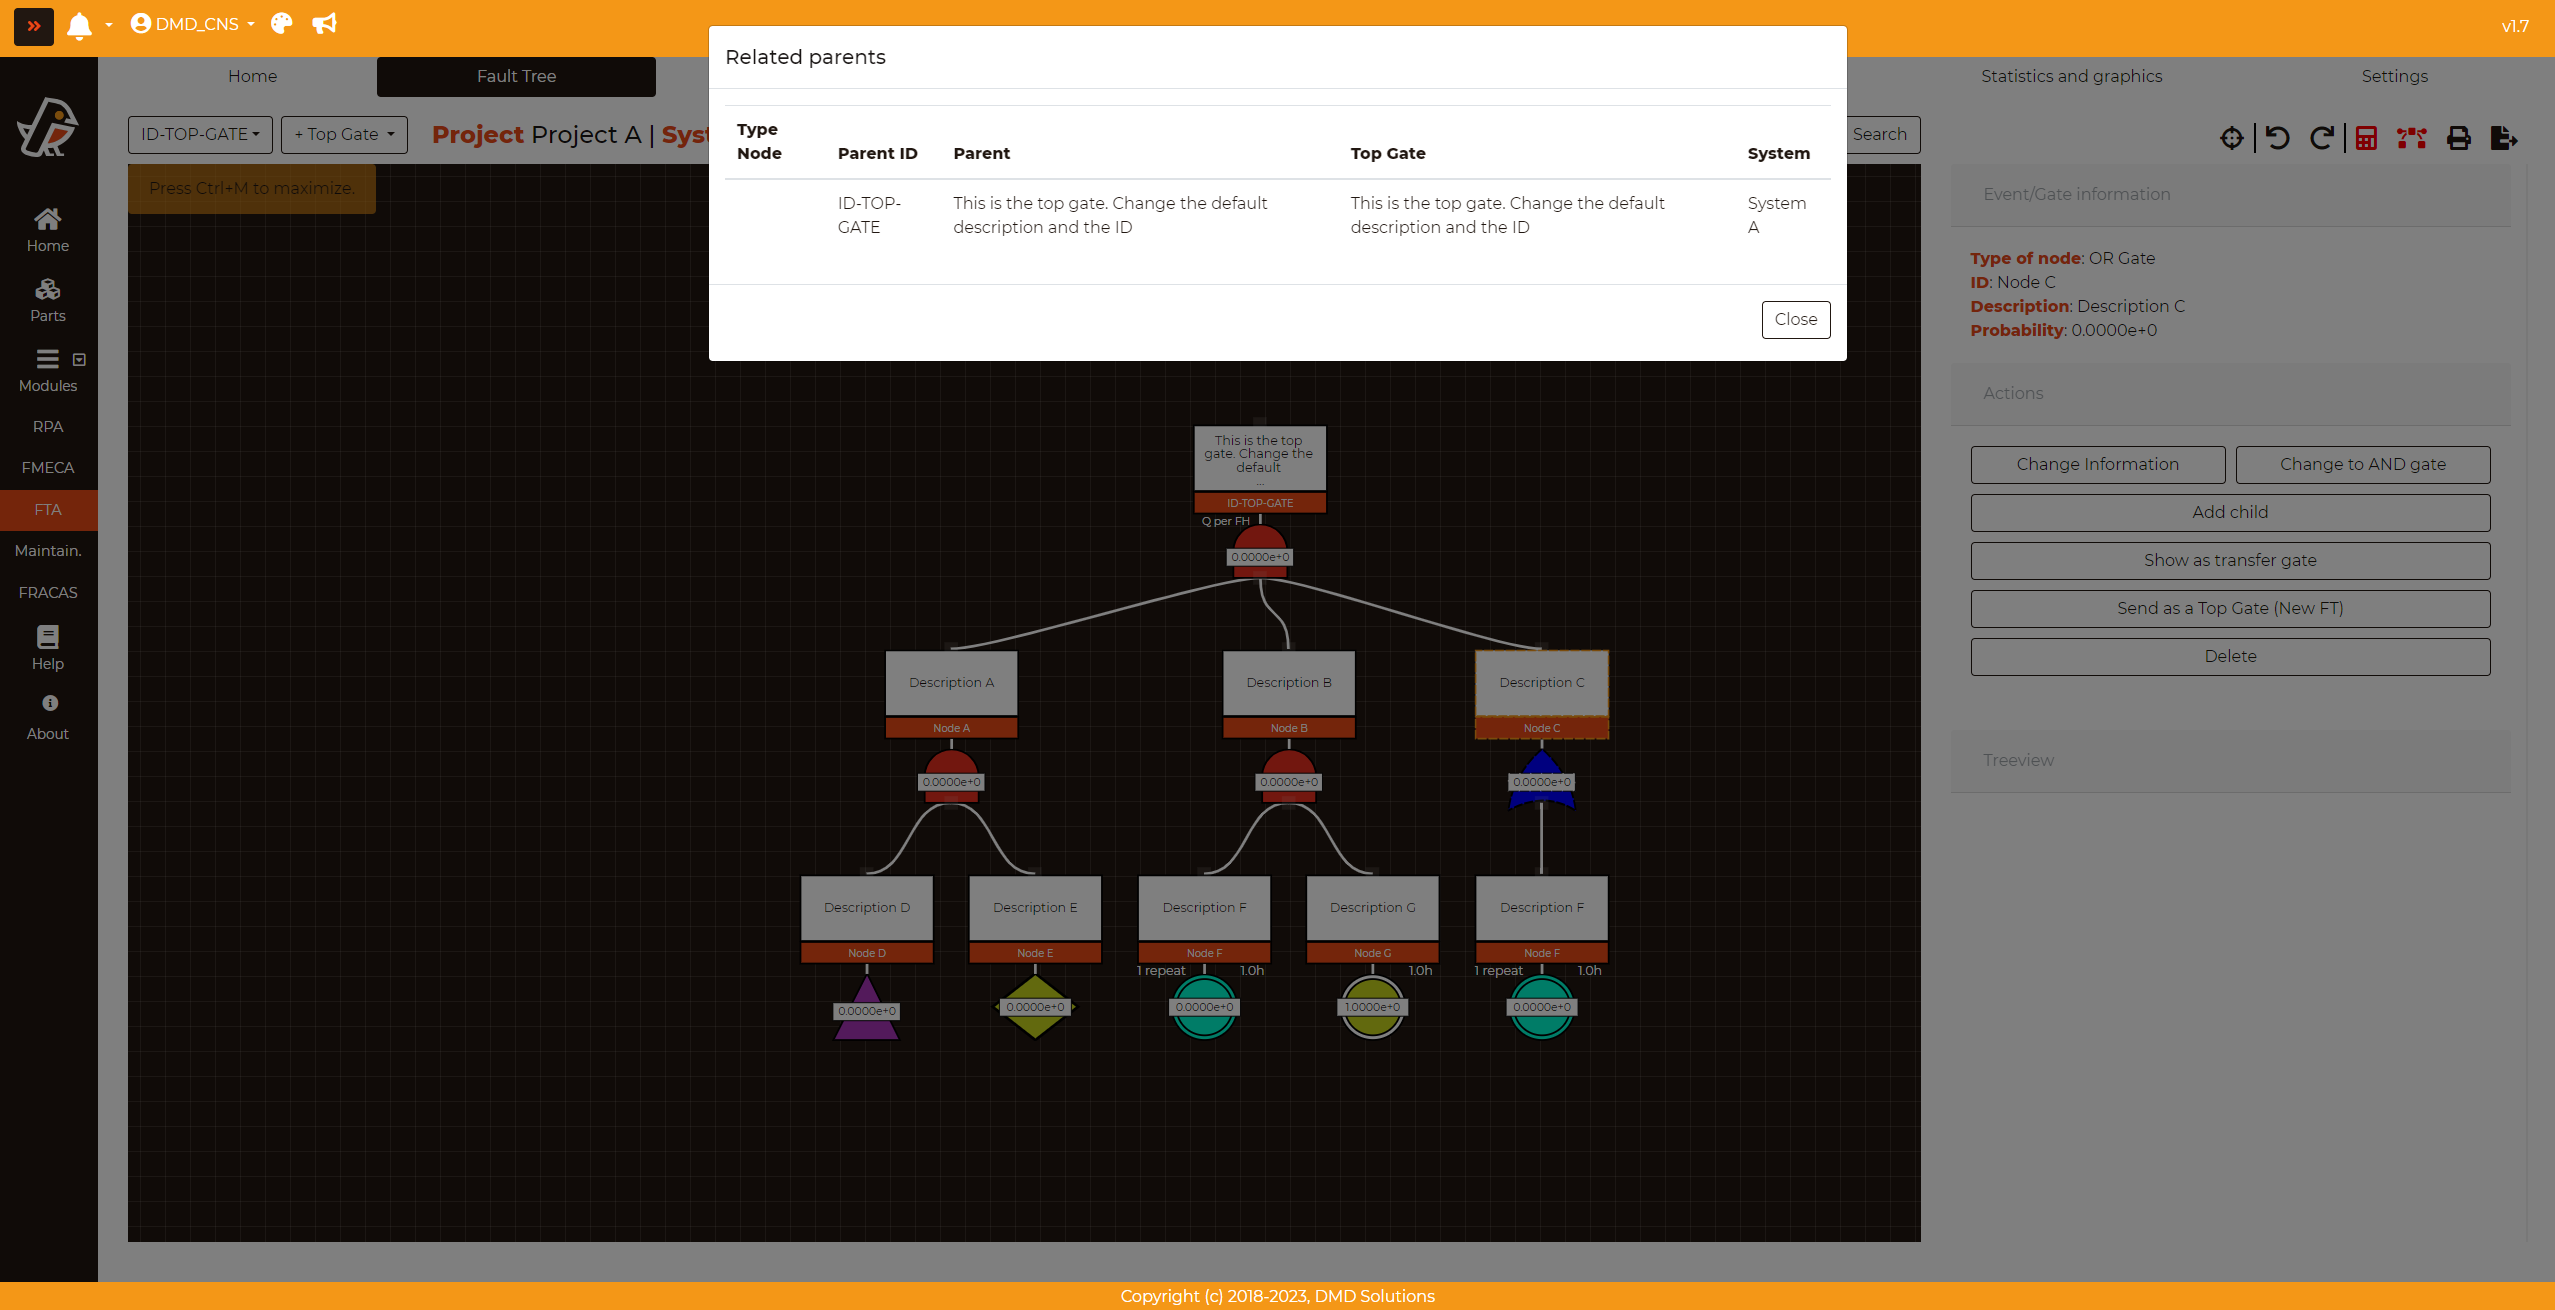
I. See related parents
This option allows user to see related parent nodes information in a modal.
Node Actions
Clicking on a node will display the different actions available with that node. Different actions can be executed depending on the type of node.
AND/OR gate actions
For AND and OR Gates, the actions available to be performed are the following:
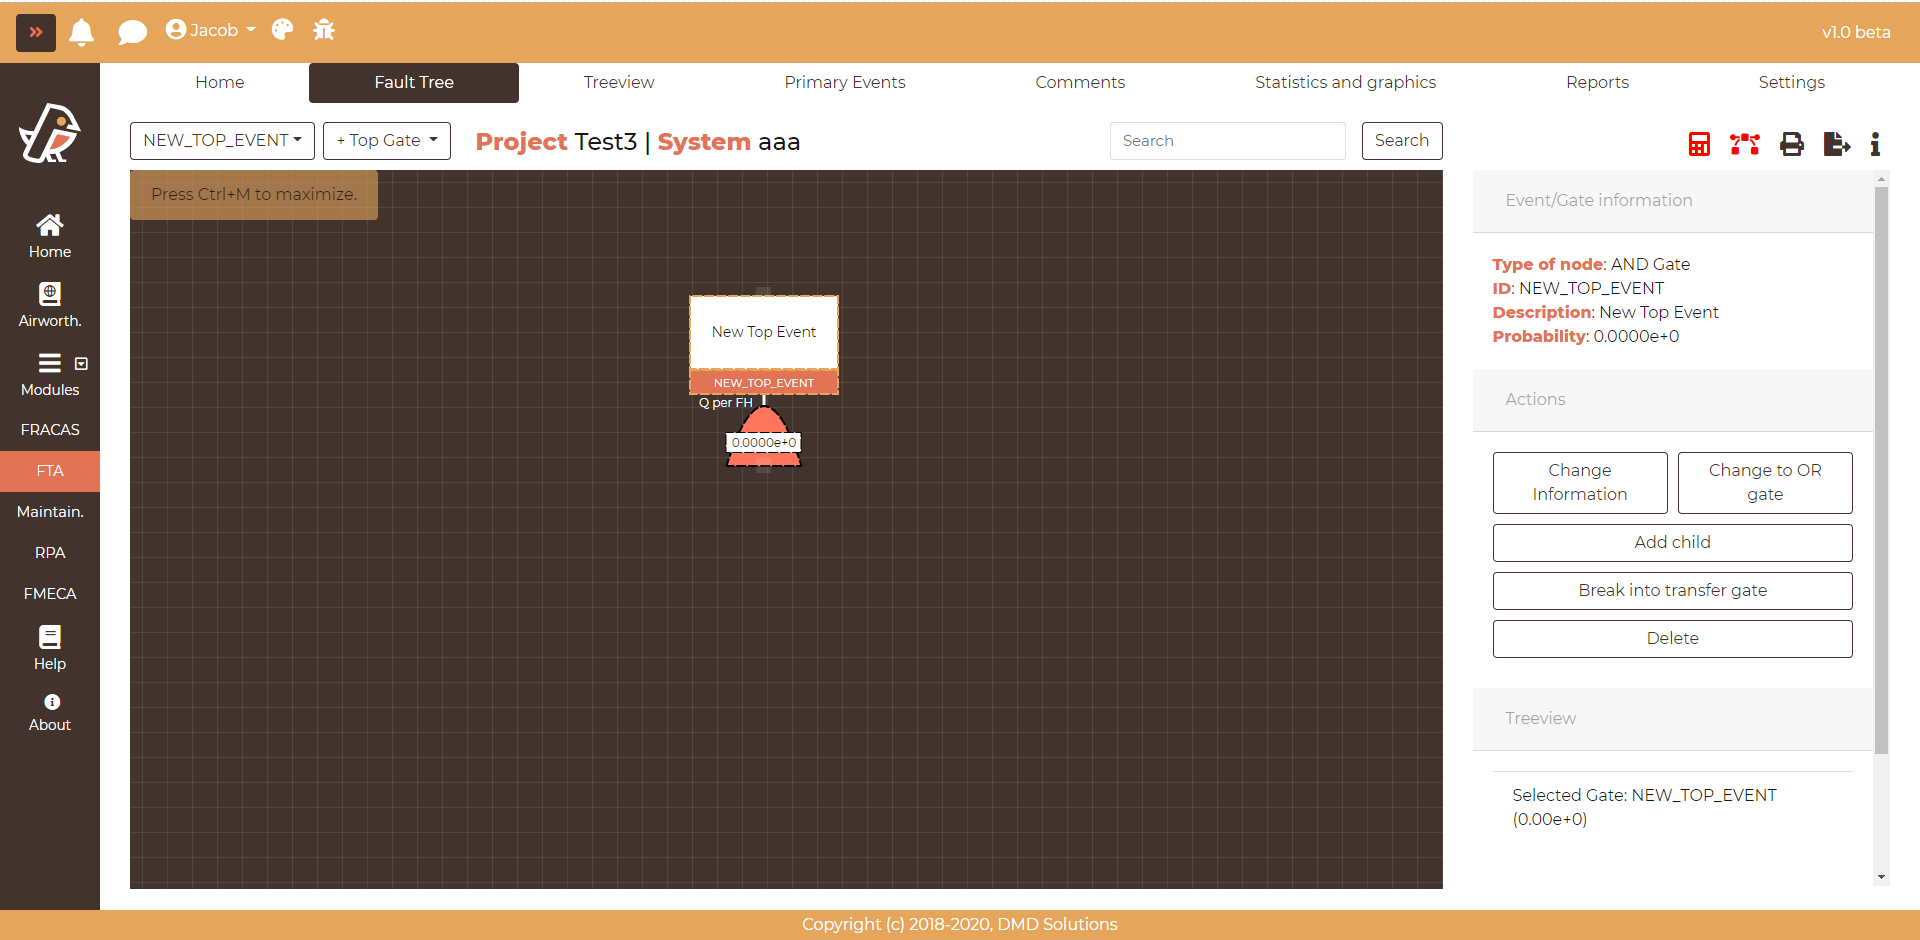
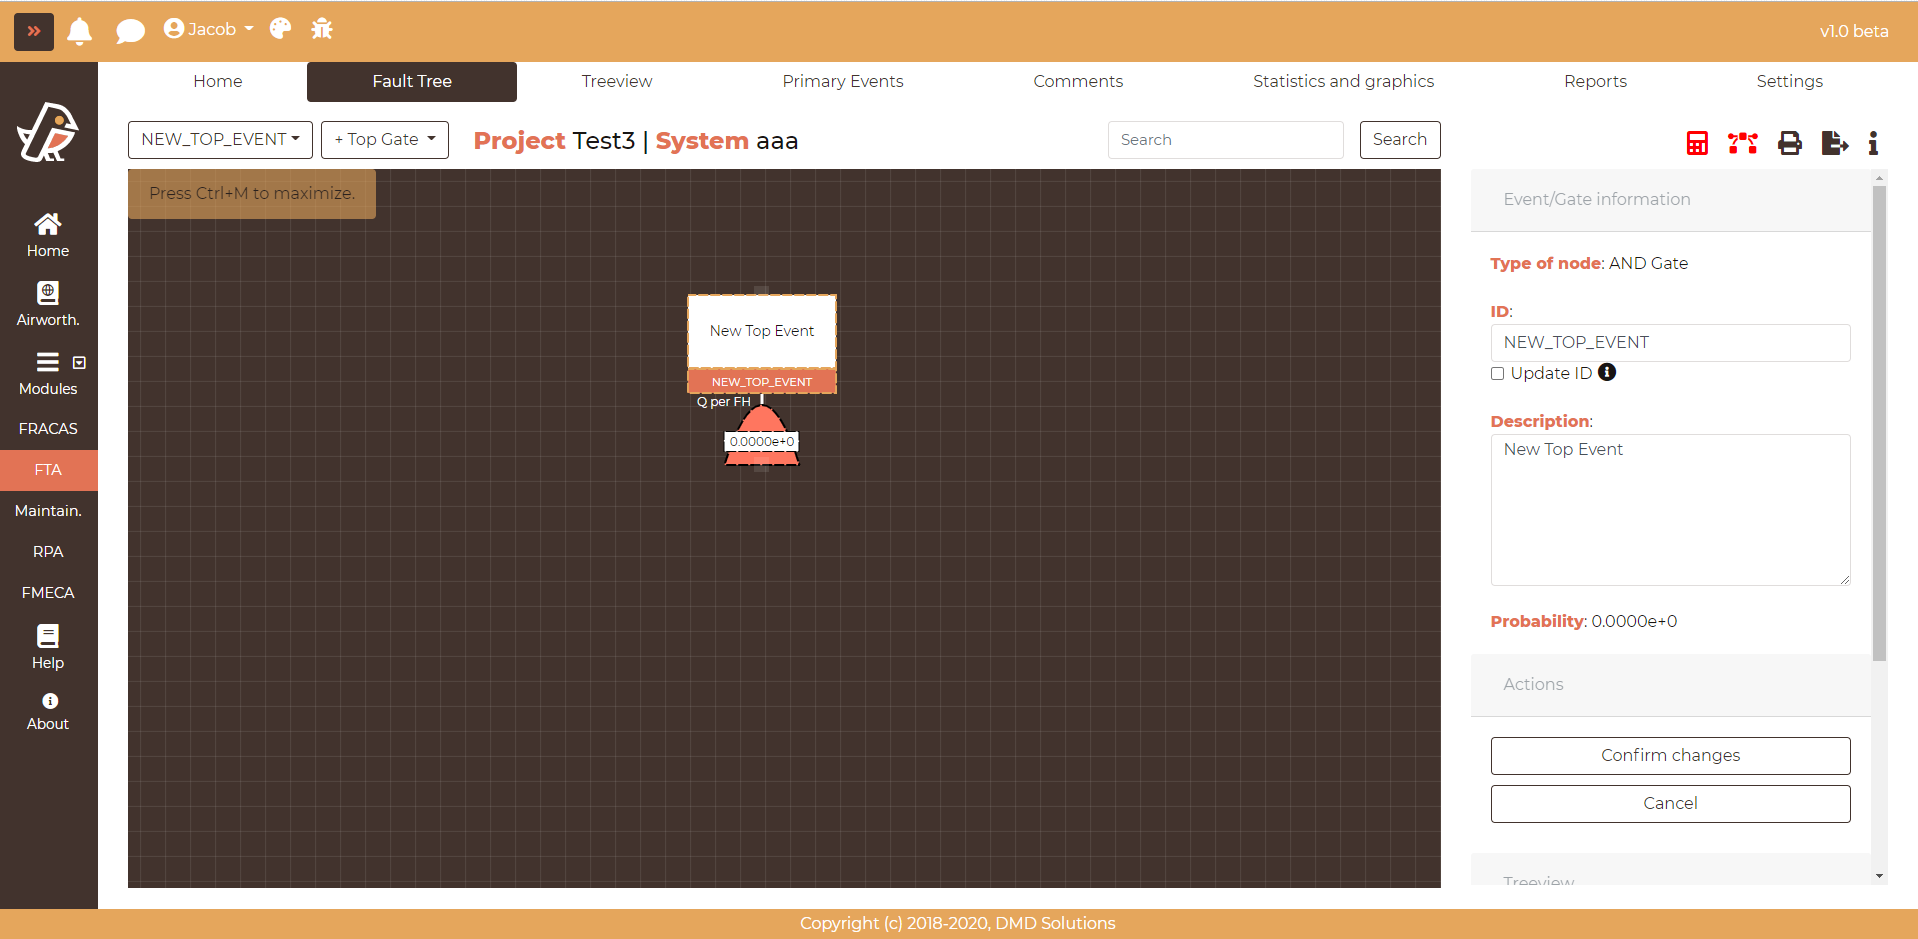
Change information
By clicking Change information, the ID and the Description of the gate can be changed. Click on Confirm changes to save the changes.
Change the type of gate
By clicking Change to AND gate or Change to OR gate, the type of gate will be transformed from an AND gate to an OR gate and viceversa.
An AND or an OR gate can also be converted into a Vote gate by clicking Change to VOTE gate. Since a Vote gate needs a threshold, Robin opens the Vote Threshold (K-of-N) dialog to introduce the value of K before applying the change. The dialog limits the value to the number of children the gate currently has.
Note
The conversion works in both directions: a Vote gate offers the Change to AND gate and Change to OR gate actions, which discard its threshold.
Change K (vote)
This action is only available on Vote gates. It reopens the Vote Threshold (K-of-N) dialog to modify the value of K without having to recreate the gate.
Note
Changing the type of a gate or the value of K invalidates the results already computed, so the fault tree has to be recalculated. See Computation for the logic applied by each gate.
Add a node
By clicking Add child, a new node can be inserted as a child of the selected node. There are different types of nodes that can be added (AND, OR, Vote, Basic, Undeveloped, Transfer and Remark).
Note
When the type selected is Vote Gate, the form shows an additional field K (vote threshold). If it is left empty, Robin asks for the value of K in a dialog after clicking Create node.
When an existing Vote gate is inserted by introducing its ID, the K field is filled in with the threshold of that gate and cannot be edited, since both occurrences are the same node.
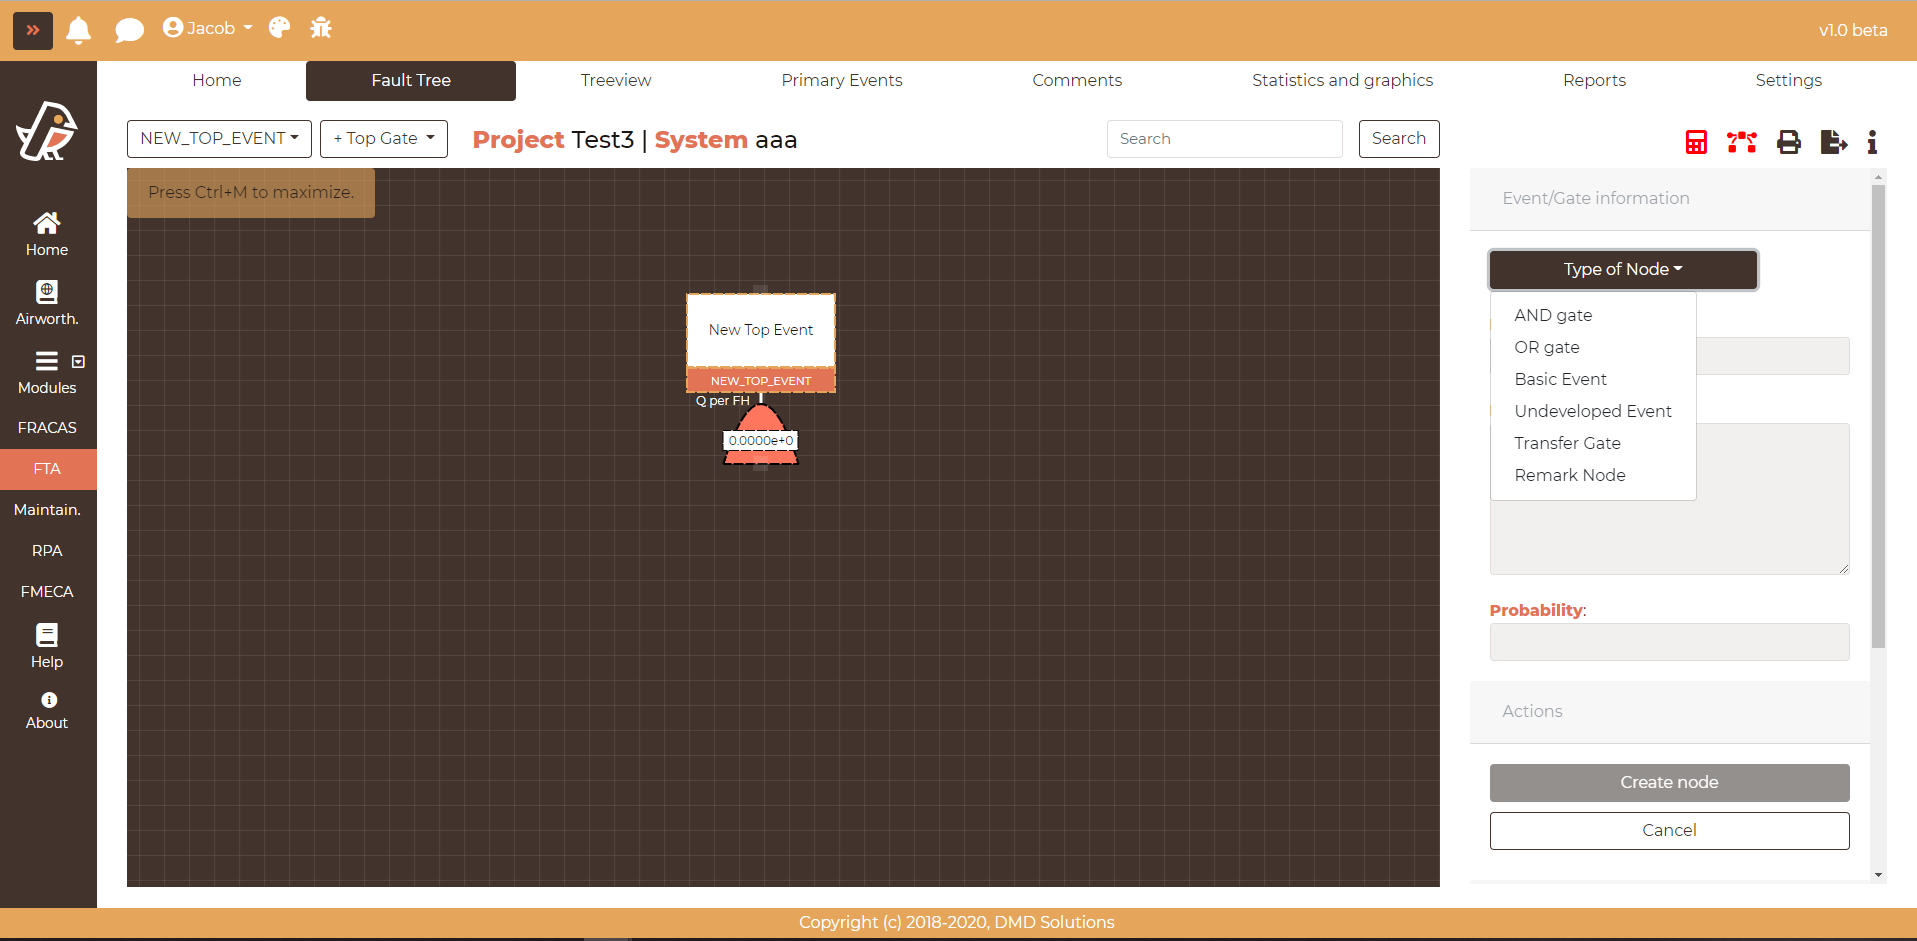
Note
For Basic, Undeveloped and Transfer gates, the user can select from a dropdown to insert an existing node inside the same project clicking on Select an existing node.
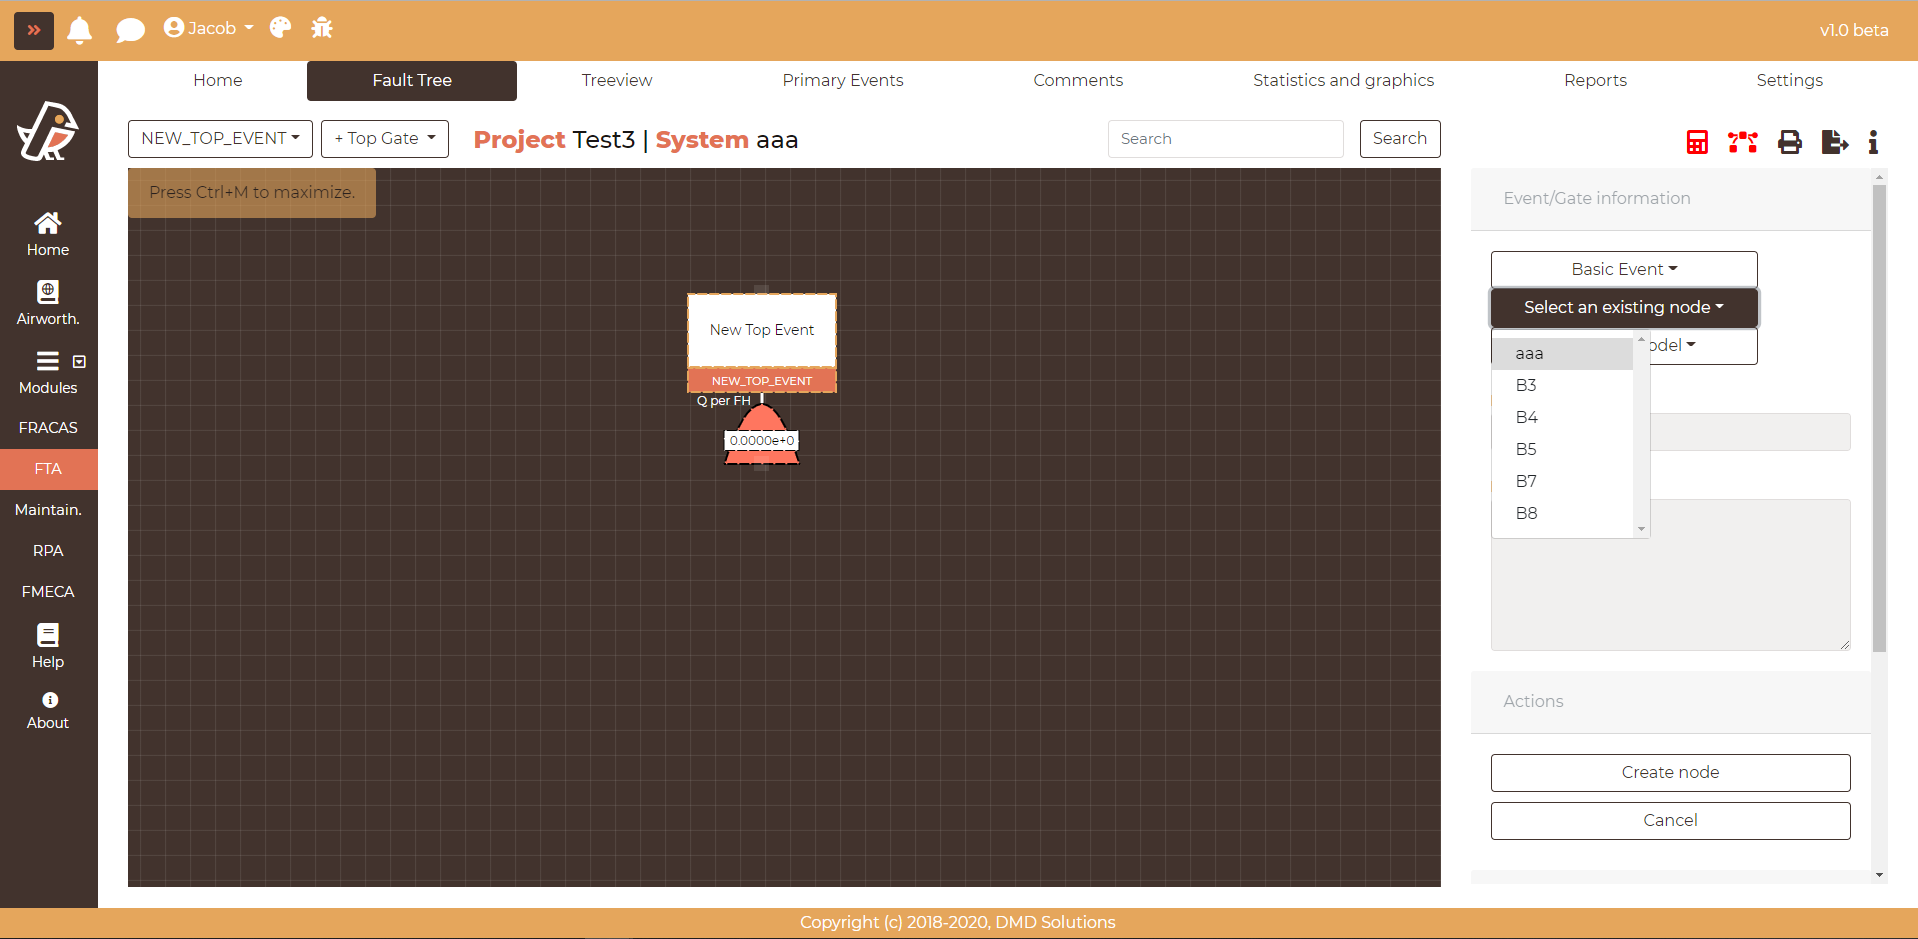
- For AND/OR gates, if the ID of an existing gate in the same project is introduced, the fields are completed with the information of the gate and the complete branch including all its children gates will be inserted.
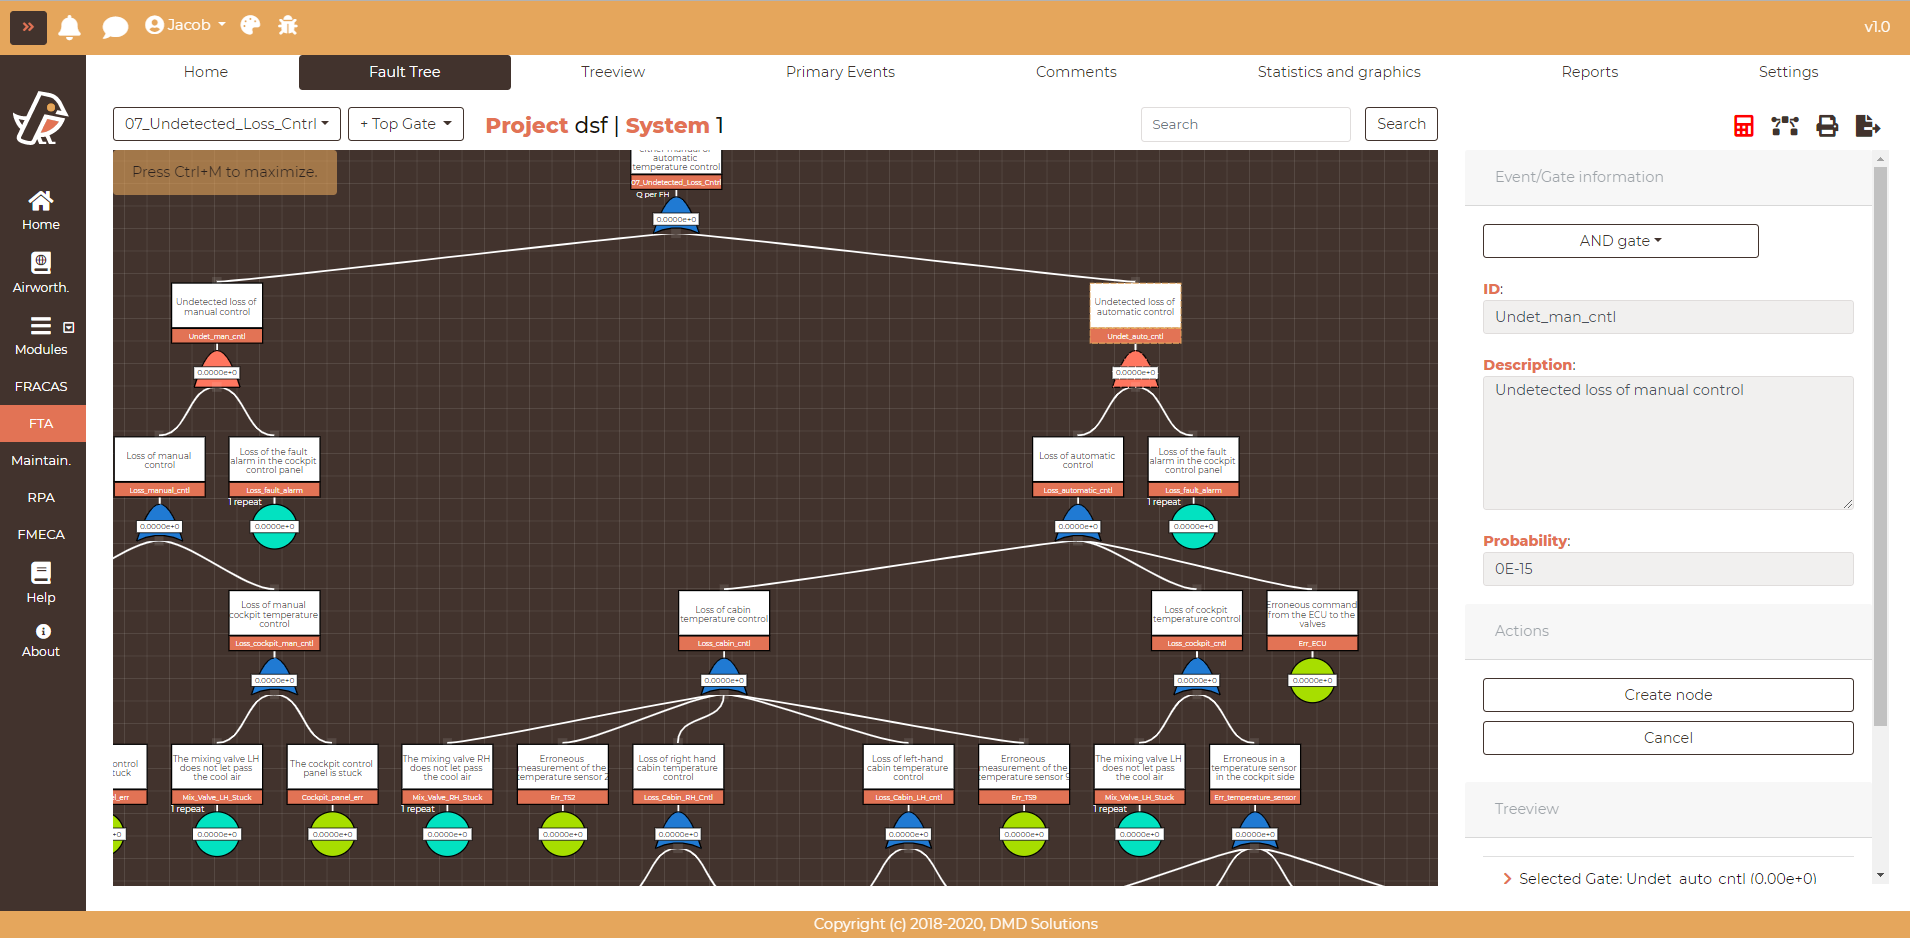
Click Create node to add the node.
See Computation for more information about the parameters of the primary events.
Show as transfer gate
The AND/OR gate branches can be broken into transfer gates to to facilitate the reading of the Fault Tree.
By clicking Show as transfer, the branch will be substituted by a transfer gate node.
Send as a Top Gate (New FT)
By clicking Send as a Top Gate (New FT), the complete branch will be copy as a new Fault tree being the node the new top gate.
Delete a node
By clicking Delete, the node and all its children will be removed.
Transfer gate actions
For Transfer gates, the actions available to be performed are the following:
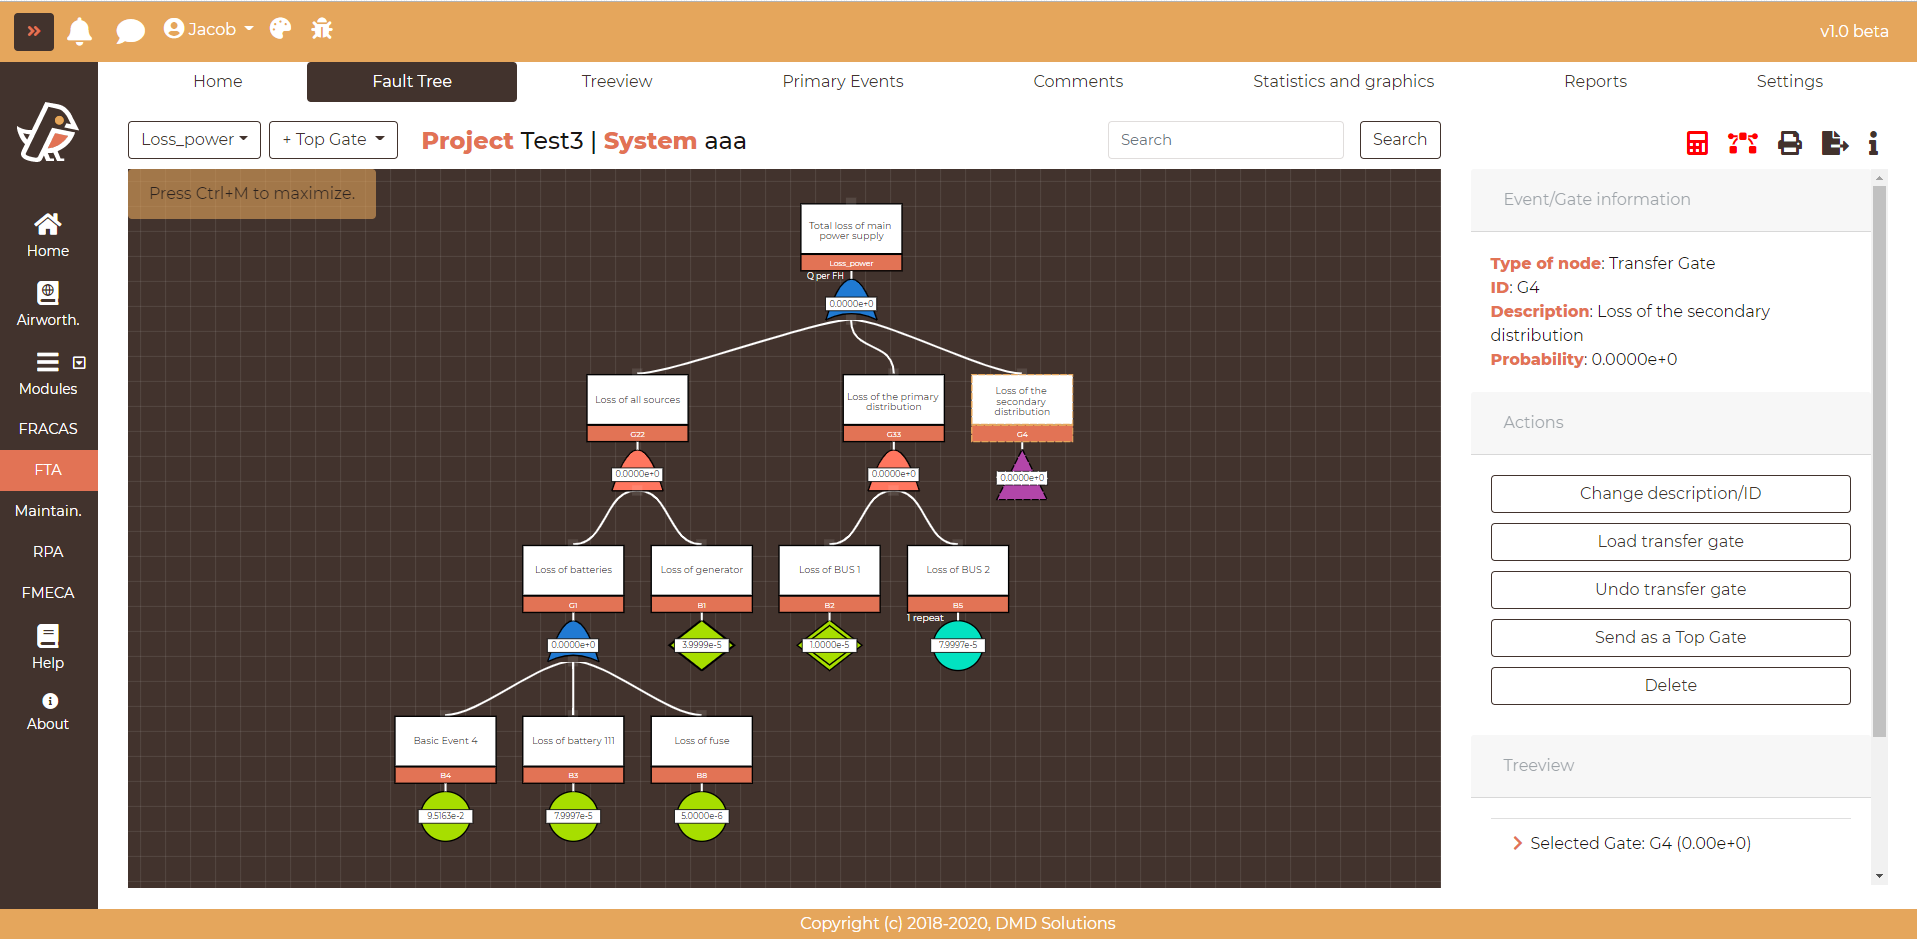
Change Description/ID
By clicking Change Description/ID, the ID and the Description of the gate can be changed. Click on Confirm changes to save the changes.
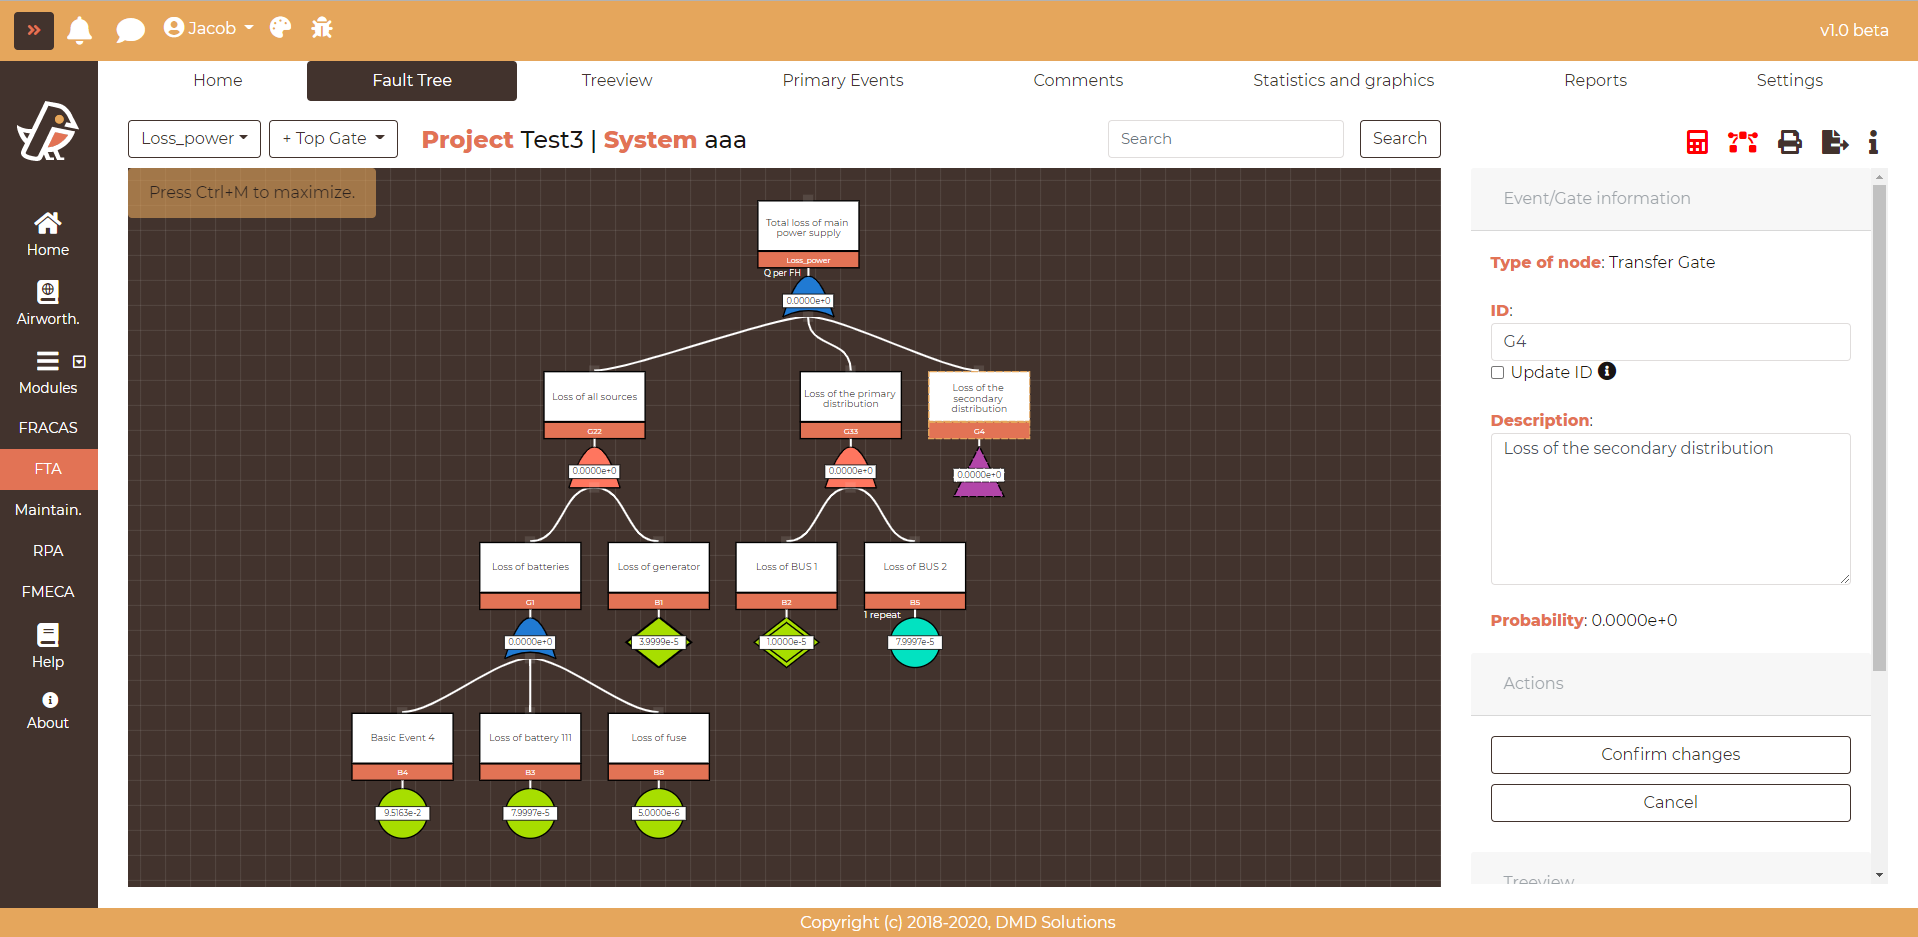
Go inside the Transfer Gate
By clicking Go inside the Transfer Gate, the branch of the transfer gate will be shown as a different Fault tree. This branch can be modified as a usual Fault Tree.
In the top of the diagram, the button Go Back will appear to collapse the transfer gate diagram and return to the original Fault Tree. Also, the transfer gate diagram’s top node will have this button available as an option.
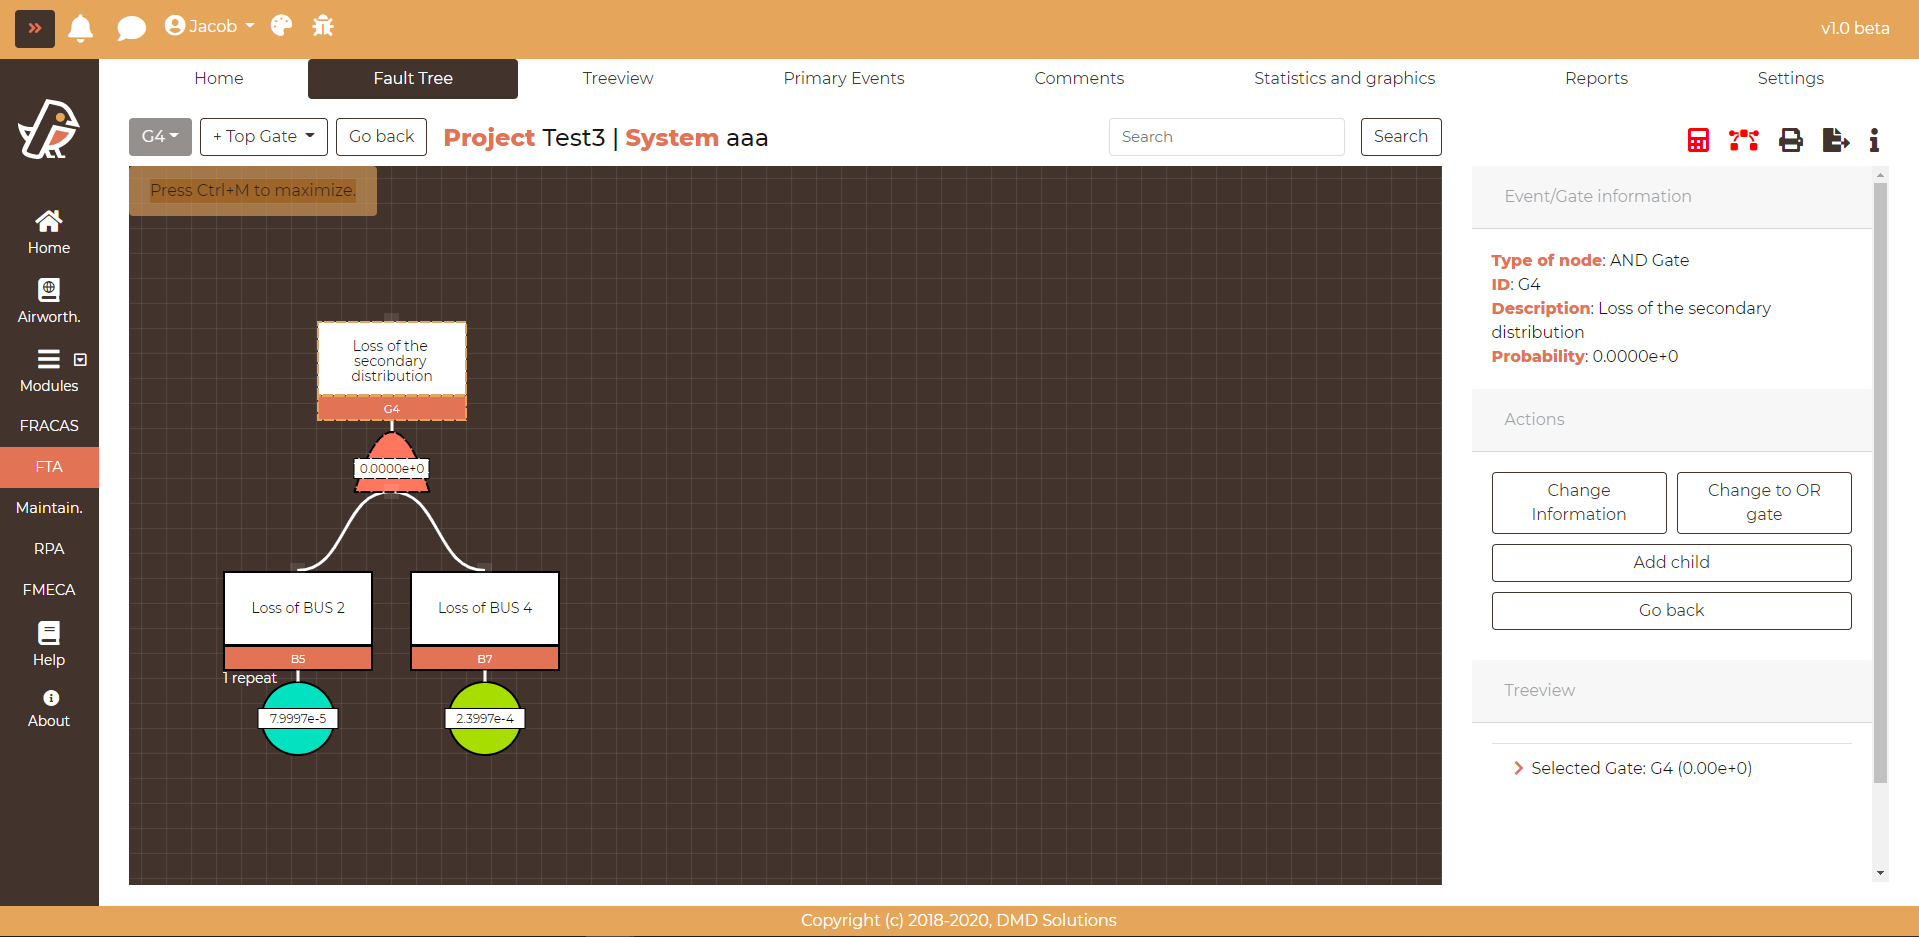
Undo transfer gate
By clicking Undo transfer gate, the transfer gate will be replaced by the original branch.
Send as a Top Gate (New FT)
By clicking Send as a Top Gate (New FT), the complete branch will be copy as a new Fault tree being the node the new top gate.
Delete a node
By clicking Delete, the node and all its children will be removed.
Basic/Undeveloped Events
For Basic and Undeveloped Events, the actions available to be performed are the following:
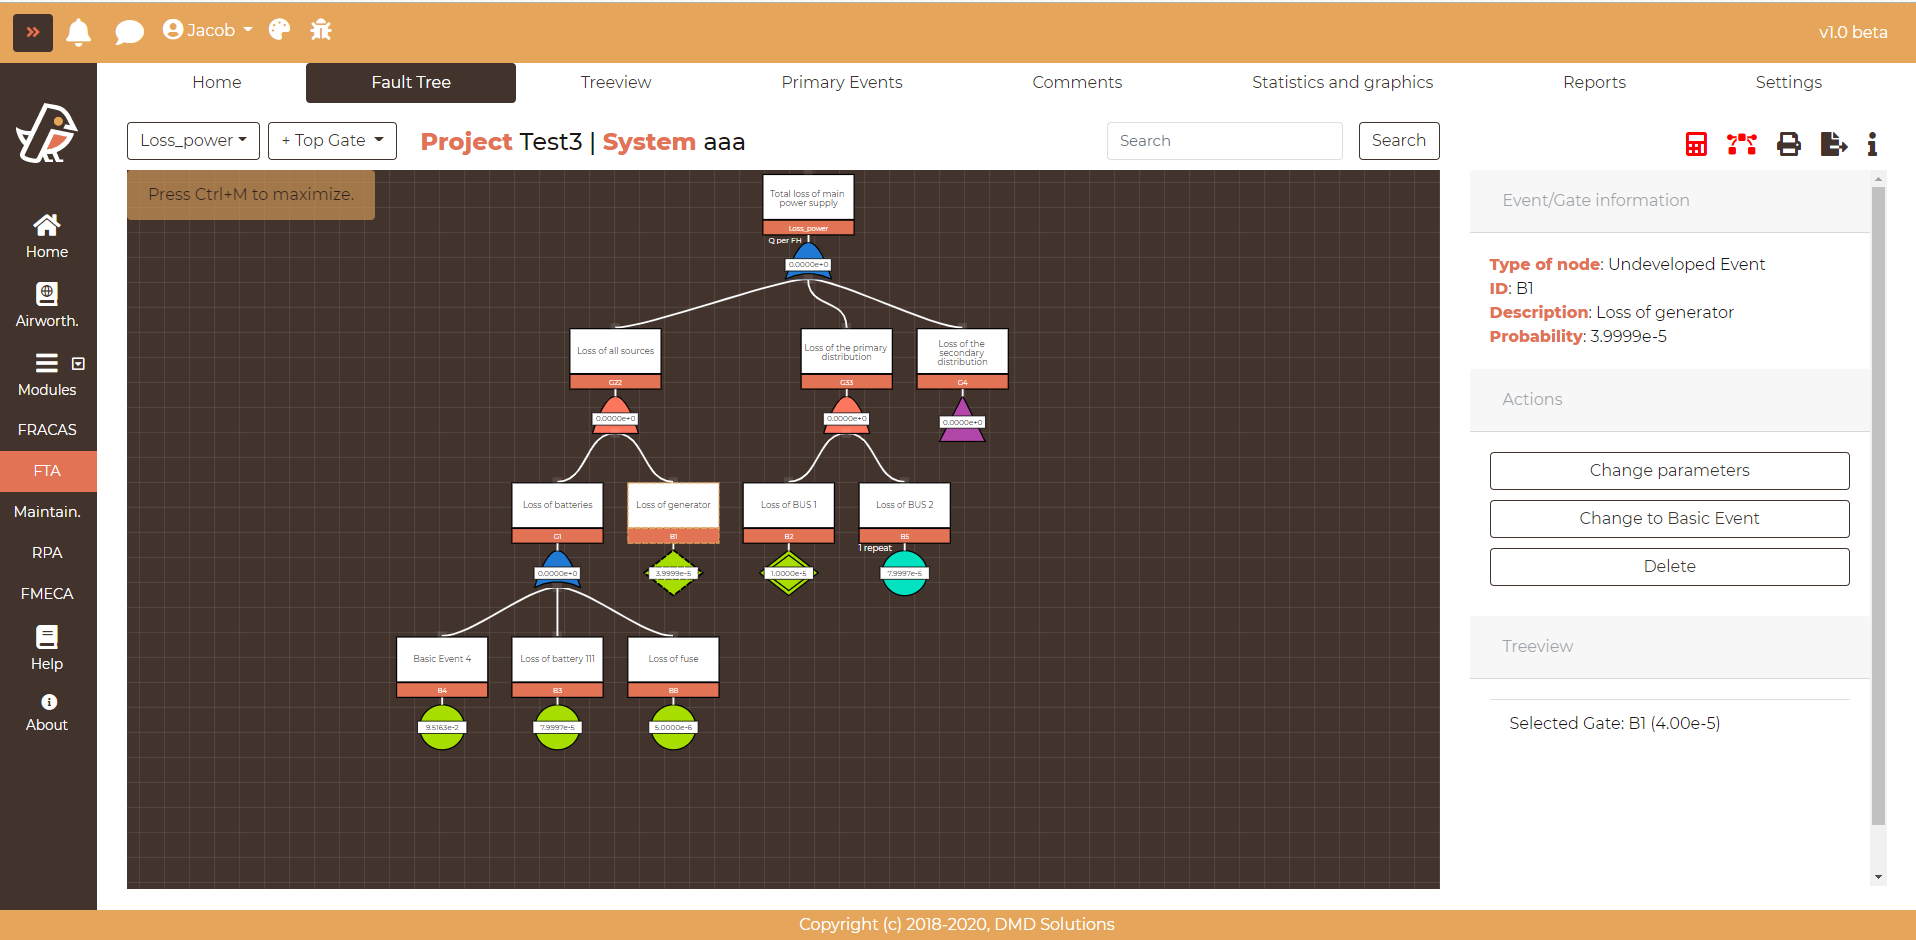
Change Parameters
By clicking Change parameters, the ID, the Description, the type of probability and the parameters related with the probability can be changed.
Click on Confirm changes to save the changes.
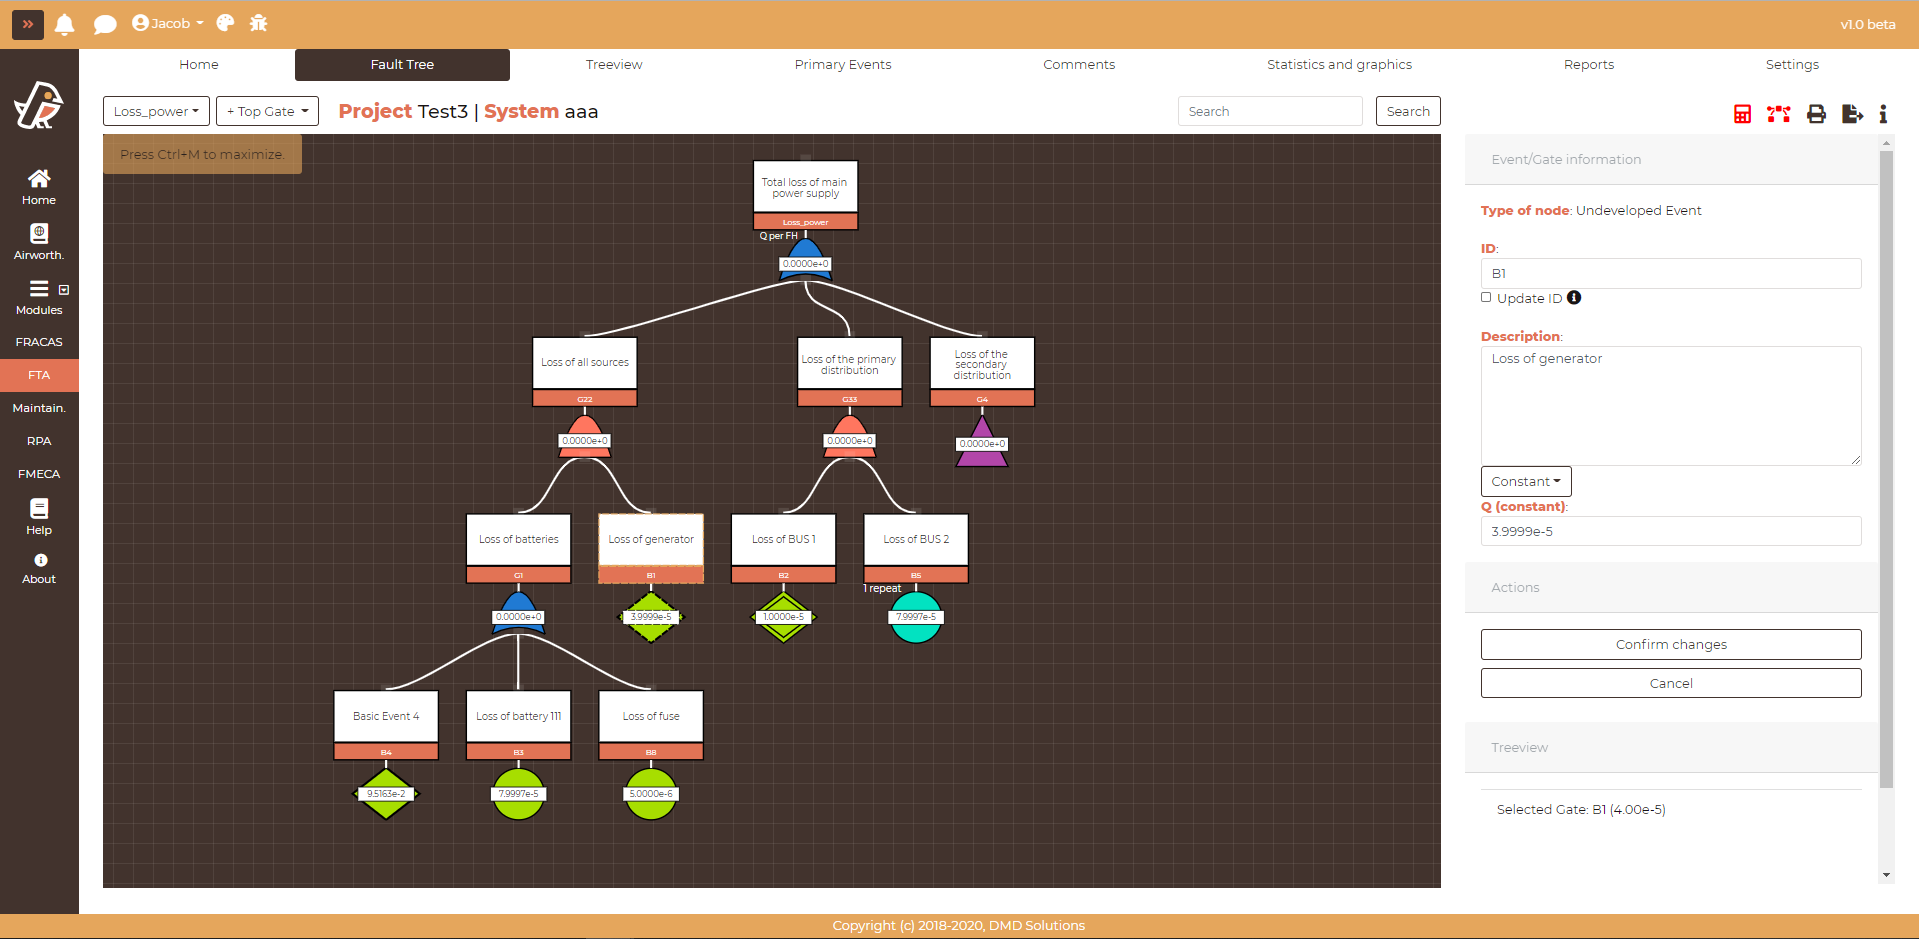
See Computation for more information about the parameters of the primary events.
Change to Basic/Undeveloped Event
By clicking Change to Basic Event or Change to Undeveloped Event, the node will change from Basic to Undeveloped event or viceversa.
Fast node creation
Building a fault tree node by node through the Add child form is slow when the structure is already known and only the topology has to be captured. To speed this up, Robin provides the Add fast child actions, which create a node in a single click, without opening any form.
A node created this way gets an automatic ID code, formed by a prefix that depends on the type of node (AND, OR, VOTE, BE, UE, TF or R) followed by an incremental number, and the default description TBD. Both can be edited afterwards through Change information or Change parameters.
The fast child actions are available in two places:
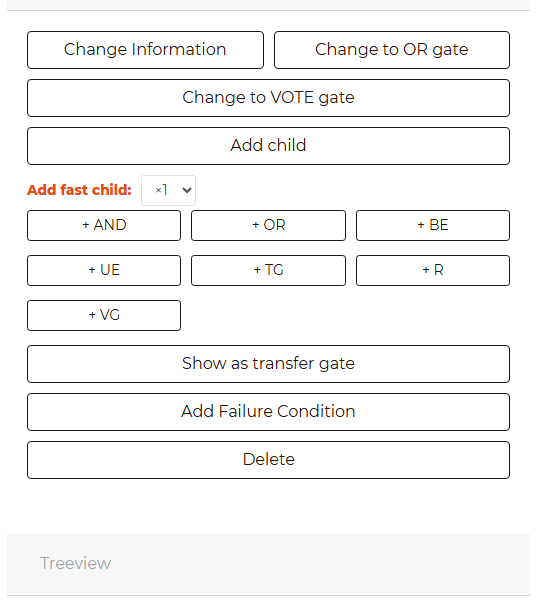
In the panel that opens when clicking on a gate, under the label Add fast child, with one button per type of node:
+ AND,+ OR,+ BE,+ UE,+ TG,+ Rand+ VG. Next to the label, a quantity selector allows the creation of several identical children at once, which is useful for redundant configurations where the same structure is repeated.In the right-click context menu, under the Add Fast Child submenu.
Note
The quantity selector allows adding from ×1 up to ×5 children per click.
Note
When the node created is a Vote gate, Robin asks for the value of K before creating it. See the Computation section for details.
Keyboard shortcuts
The fast child actions have a keyboard shortcut each. Select a gate in the diagram and press the corresponding combination to add a child of that type below it:
Action |
Shortcut |
|---|---|
Add AND gate |
|
Add OR gate |
|
Add Basic Event |
|
Add Undeveloped Event |
|
Add Transfer gate |
|
Add Remark node |
|
These shortcuts are added to the ones already available in the diagram:
Action |
Shortcut |
|---|---|
Copy |
|
Cut |
|
Paste |
|
Undo |
|
Redo |
|
Move node left/right |
|
Maximize the diagram |
|
Note
The Vote gate has no keyboard shortcut, since it always requires the value of K to be introduced before the node can be created.
Note
The shortcuts only act when the focus is inside the diagram. They are disabled while the user is typing in a form or working outside the diagram area.
Checking the Fault Tree
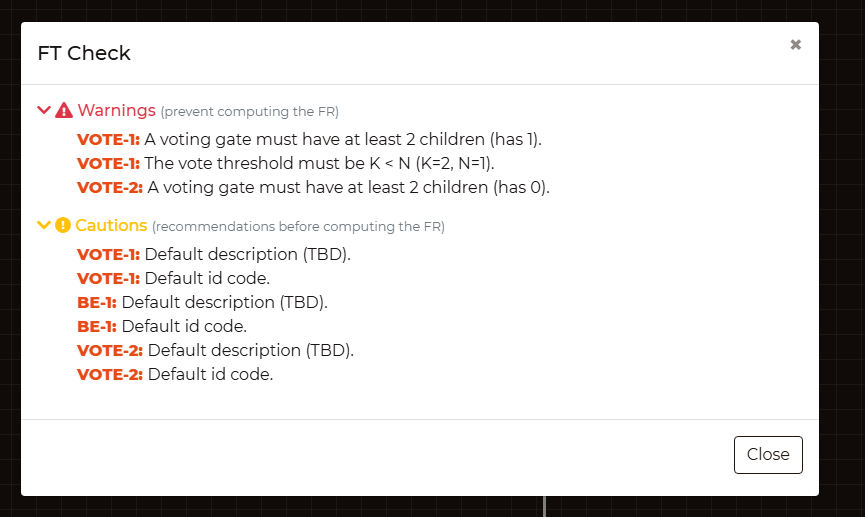
Before computing the probability or exporting a report, Robin can verify the consistency of the loaded fault tree. The check reports two levels of issues:
Warnings: Errors that prevent the failure rate from being computed. They are:
An AND or an OR gate without any child
A Vote gate with less than 2 children
A Vote gate whose threshold is not lower than its number of children (\(K \geq N\))
Cautions: Recommendations to apply before computing, which do not block the calculation. They are:
A node left with the default description
TBDA node left with the automatically generated ID code (e.g.
AND-12orID-TOP-GATE-3)
Note
Branches that have been switched off are not checked, since they are not part of the computation.
Note
Cautions typically appear on nodes created with the fast child actions described above, which are exactly the nodes still pending to be named and described.
Two options are available at project level to adapt the check to the way the project is built:
Allow print/export with warnings: When active, the report can be generated even if the check reports warnings. It is disabled by default.
Remark gates count as children: Remark gates do not take part in the computation, so by default they do not count when verifying that a gate has at least one child. Activating this option makes them count.